As a follow up to the organising your Edublogs sites post from last week, in this post we will look at how you can control the menu for your site using two different methods.
When you first create an Edublog site, you’ll notice that within the posts and pages section there are example posts/pages. Usually called ‘sample page’ or ‘Hello world’ for example. I always recommend that these example posts/pages are deleted, unless you have been setup with a specific template that has been tailored to your module.
When you then start creating your blog site, you may want to have a home page, about me, CV, Reflections, Contact. It really depends on how your tutor would like you to setup the blog and what they require in terms of the pages you need.
All blog sites are setup so that when you create a page, the new page (once published) will automatically appear in the top navigation menu.
Most blogs are also setup so that any post your publish will also automatically appear on your home page.
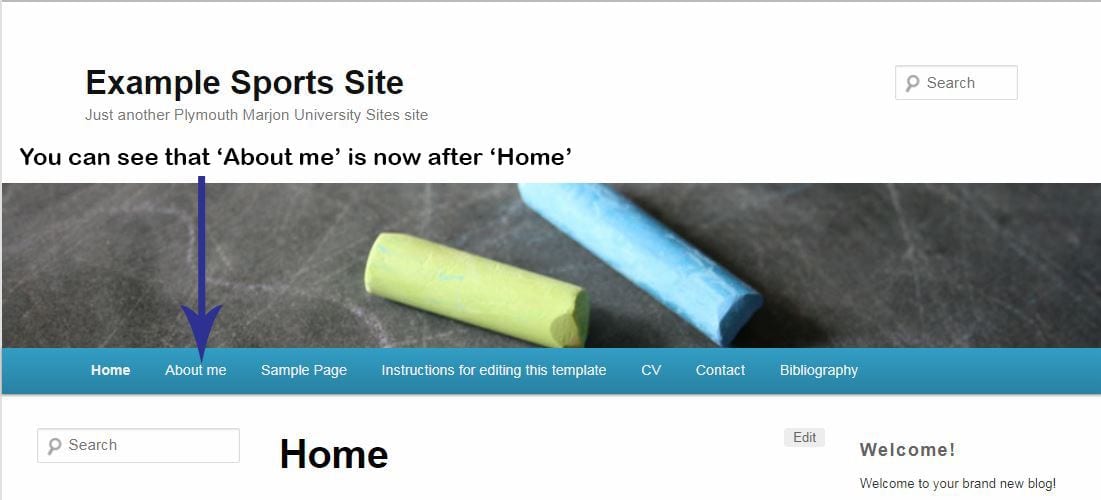
But what if you find that the navigation order is not what you want, so for example you have a page called ‘placements’ and after this page is your ‘about me’ page, but you want the about me page to show before the placements page?
There are two methods to fix this issue, one is relatively straightforward and the other method involves a little more tweaking.
Method 1
- go to the dashboard for the site you wish to edit. (hover your mouse cursor over ‘My Sites’)
- go to ‘Pages’ > click to edit the first page you wish to appear on the menu (this is usually ‘home’, but could be another page).
- Look to the right-hand side of the page and in the page attributes section enter ‘1’ in the order box.
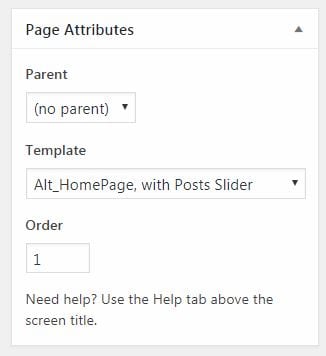
- Repeat the above steps for all your pages in order of preference, so for example if your ‘about me’ page was to come after your ‘home’ page then you’d enter ‘2’ in the order box when editing your ‘about me’ page.
Please note that you must order every page, otherwise any pages not ordered will have ‘0’ assigned and the pages will not order as you need them to
The other point to mention is that you can’t order posts in the way you can with pages. This is because by their nature posts are more collaborative and most blogs are setup to display most recent posts first on your home page.
Method 2
If you want more control over your menu, for example to add a drop-down menu – you can do this by creating your own menu withing ‘Appearance > Menus’
- Go to the appearance > Menus area
- Create a new menu (call it main menu)
- You will see a layout that looks like the below screenshot. Here you can see on the left, all your pages – simply check any that you want to add to the menu and click on ‘Add to menu’
- You will see your pages appear in your new menu.
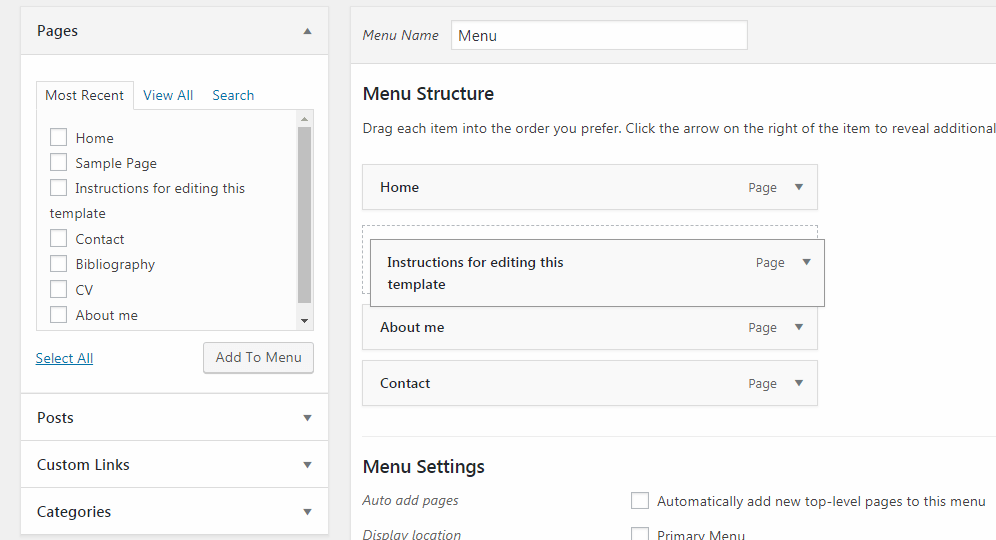
- You can rearrange your menu items by clicking and dragging the page up or down as above.
- Once you are happy with your menu, you should check the ‘Primary Menu’ box and ‘Save Menu’
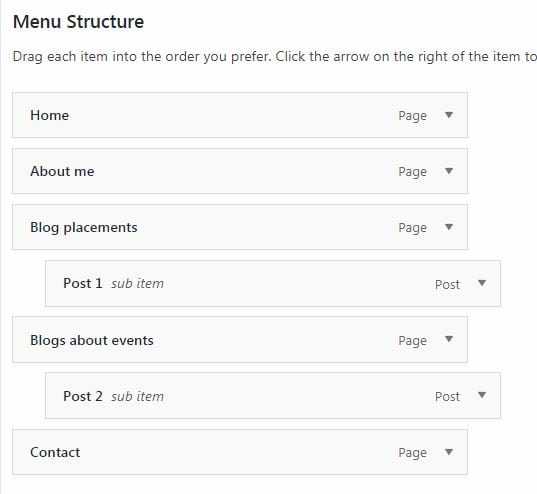
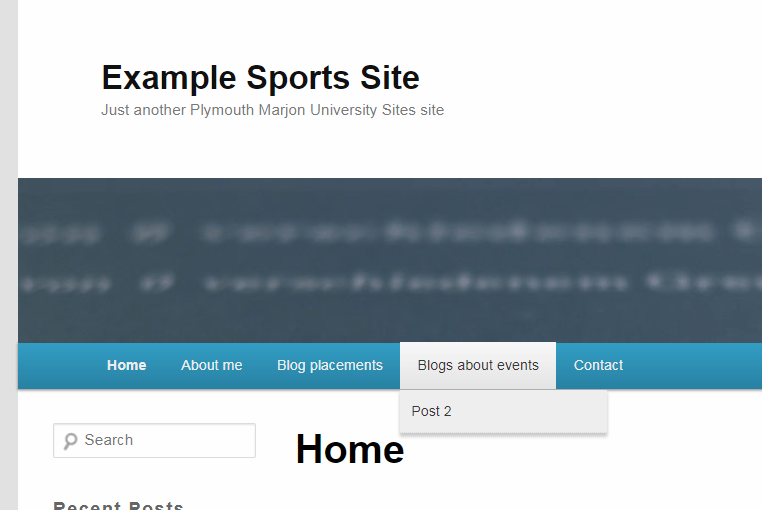
The good thing about this method is that you can open up your posts and add individual posts to your new menu. You can then drag those posts and make them appear as a drop-down menu item for any of the above pages. Useful if you have a set of blog posts covering a different aspect of your blog that you want to highlight.
So just follow the same steps for adding a page, except using posts – but this time you can indent the post underneath a page to create the drop-down menu item, shown as below.
If you want to find out more about about Edublogs or need help, we have a TEL help site with Edublogs guides available here: https://sites.marjon.ac.uk/elearninghelp/
Watch the below screencast to see how the different methods work.