[Back to Student Training page]
Digital tools can help save time and make you more efficient, we think that the following tools are very useful and will help you with your studies whilst at Plymouth Marjon University.
Complete guide to using your phone to capture interviews
Note: This guide is for face-to-face meetings, which should be undertaken safely outside and comply with COVID restrictions (2 meter distancing)
Evernote is a great tool, which enables you to capture notes and also audio interviews for free!
This guide will take you through the process of how you can capture audio interviews using your phone and how to edit them using Audacity.
1. The first step is to download the Evernote app onto your mobile device (visit the Android play store or itunes store on your phone)
2. Open the Evernote app on your phone and either create a new account using your Google account or enter your email address and follow the prompts to setup your new account
3. On the next screen you should opt to close the window, as displayed in the below screenshot
4. You should now be taken to the home screen, (note you may need to scroll through a help walkthrough first.) where you should click on the green + icon
5. Next, select the ‘Audio’ option – this will open a new Evernote and the recording will automatically begin. When you have finished the interview, just tap the top left-hand side of the screen to stop the recording. (Enter a title for the recording if you wish)

Watch a video tutorial to learn more
How to edit your audio interview using Audacity
If you need to edit your Evernote audio interview, then you will need to firstly convert the format from a .AMP to a .MP3 format. After you have done this you will be able to use Audacity to edit the interview, follow the below steps to learn how.
1. Login to your online Evernote account (note you will need to go through the walkthrough tour first before you will see your assets)
2. Click on the audio Evernote you want to edit (we’ll need to download a copy)
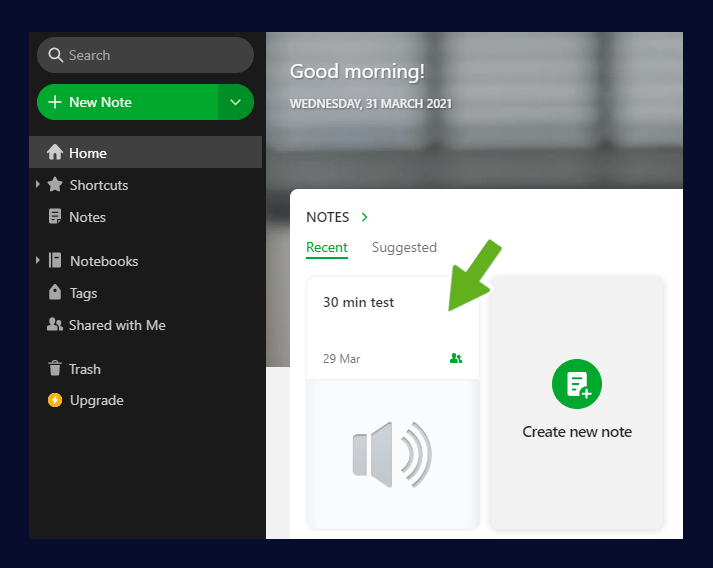
3. Select the track, then click on the downward arrow to download it from your browser

4. Depending on the browser you use the file will download onto your computer. This guide uses Google Chrome and the download will appear in the bottom toolbar

5. Right-click on the above downloaded file (if using Chrome) and select ‘Show in folder’
6. Copy the file and paste it into a more suitable and manageable location on your computer
7. Head back to your browser and open a new tab and visit the following website: https://convertio.co/amr-mp3/
8. Select ‘Choose files’ and find the Evernote audio file on your computer

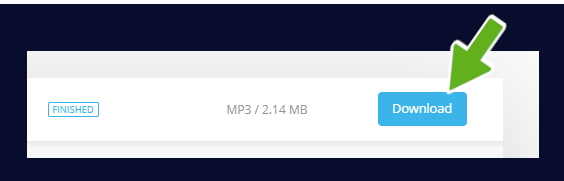
9. Next select the ‘Convert’ option to convert the file and when it is ready download and save it to your computer as before
Watch a video tutorial to learn more
Using Audacity
If you have not done so already, download the free Audacity software and open the program once downloaded onto your computer
1. Open Audacity and the interview audio file you converted earlier (.mp3 file)
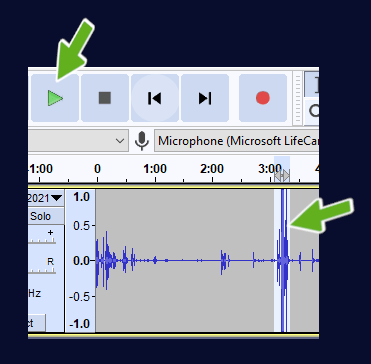
Take note of the below screenshot – this shows which levels are too high and too low in the below example to give you an idea of what the audio sound wave represents:

The following tutorials have been created to help you correct basic issues, you can do a lot more in Audacity!
To remove loud noises such as bangs and fire alarms or extended gaps, follow the below steps:
2. Click and drag over the loud section as in the below example and press the play button
3. Next select ‘View’ > ‘Zoom to selection’ > This will enable you to zoom in closer to see the audio section more clearly
4. Note: you may need to re-select the area for improved accuracy. With the loud area selected press the ‘Delete’ key on your keyboard

5. Hold down the ‘Ctrl’ key and press the number ‘3’ key until the audio interview has zoomed out enough for you to access other sections for editing
Editing audio sections to lower any high levels
There may be circumstances where the person you are interviewing has a loud cough or the volume of their speech increases to a point that distorts and is too loud. In this event you can use the ‘Envelope’ tool to edit individual sections of your interview. Follow the steps below if you need to lower the levels of specific sections of your interview:
1. As above, select the area with the raised audio levels and Zoom to selection. (listen back to the part to make sure it’s the right part)
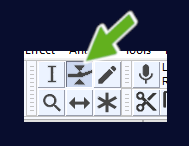
2. Make sure the selection is neat and compact to the area and select the envelope tool
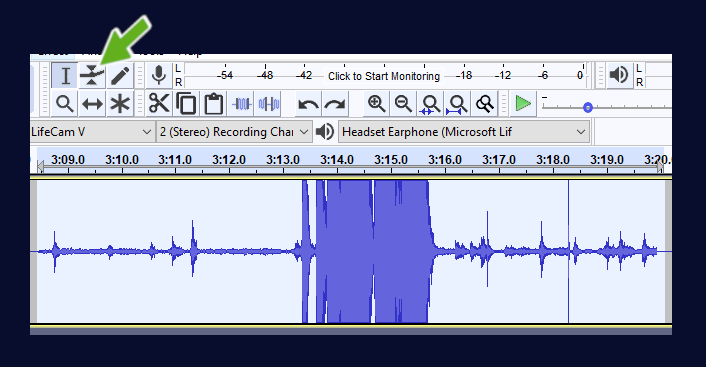
3. When you move your mouse over the below waveform you will notice the cursor change to an up and down arrow
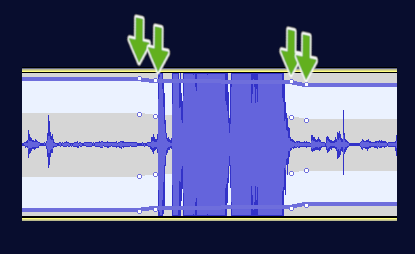
4. You will now need to click into the waveform four times. The position of the pointers are important. Firstly click before the loud section starts. Then click just before or on the loud part start position. Next click just after the loud bang or noise stops. Finally click one more time after the loud part. (This will make sense soon!) The below screenshot is an example of this and your pointers should be in a similar place on your loud section.
5. Click and drag the second pointer downwards to lower the amplitude to a reasonable level (see below screenshot of completed audio treatment) > Repeat the process on the third pointer and drag it to match the second pointer.
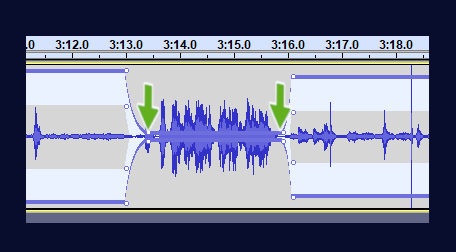
6. Click back on the ‘Selection’ tool to come out of the envelope tool

Raising the levels for any quiet or faint sections in your interview/audio
1. To raise the levels for any quiet sections in the waveform, click and highlight the quiet part
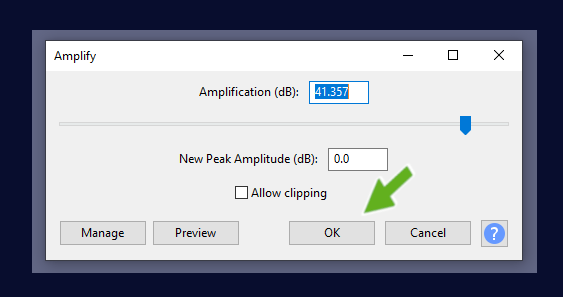
2. Select ‘Effect’ > ‘Amplify’
3. The tool should automatically work out the correct level boost required, so simply click on ‘Okay’ (if not you can always ‘undo’ and try again)
Tip: If the entire audio piece is low, select the entire audio clip and simply follow the above steps!
Watch a video tutorial to learn more
You can do a lot more in Audacity, but hopefully the above will help you with basic audio issues.
When you have completed your audio improvements, click on ‘File’ > ‘Export as MP3’
For students on PBHM06
Please follow the guidance in the following video for how to upload your interview to PBHM06 assignment folder in Panopto. (note: if you are not part of this module, please ignore this video)
Additional: Sharing your Evernote
If you wish, you can share your Evernotes with other people directly from the app. To do this follow the below steps:
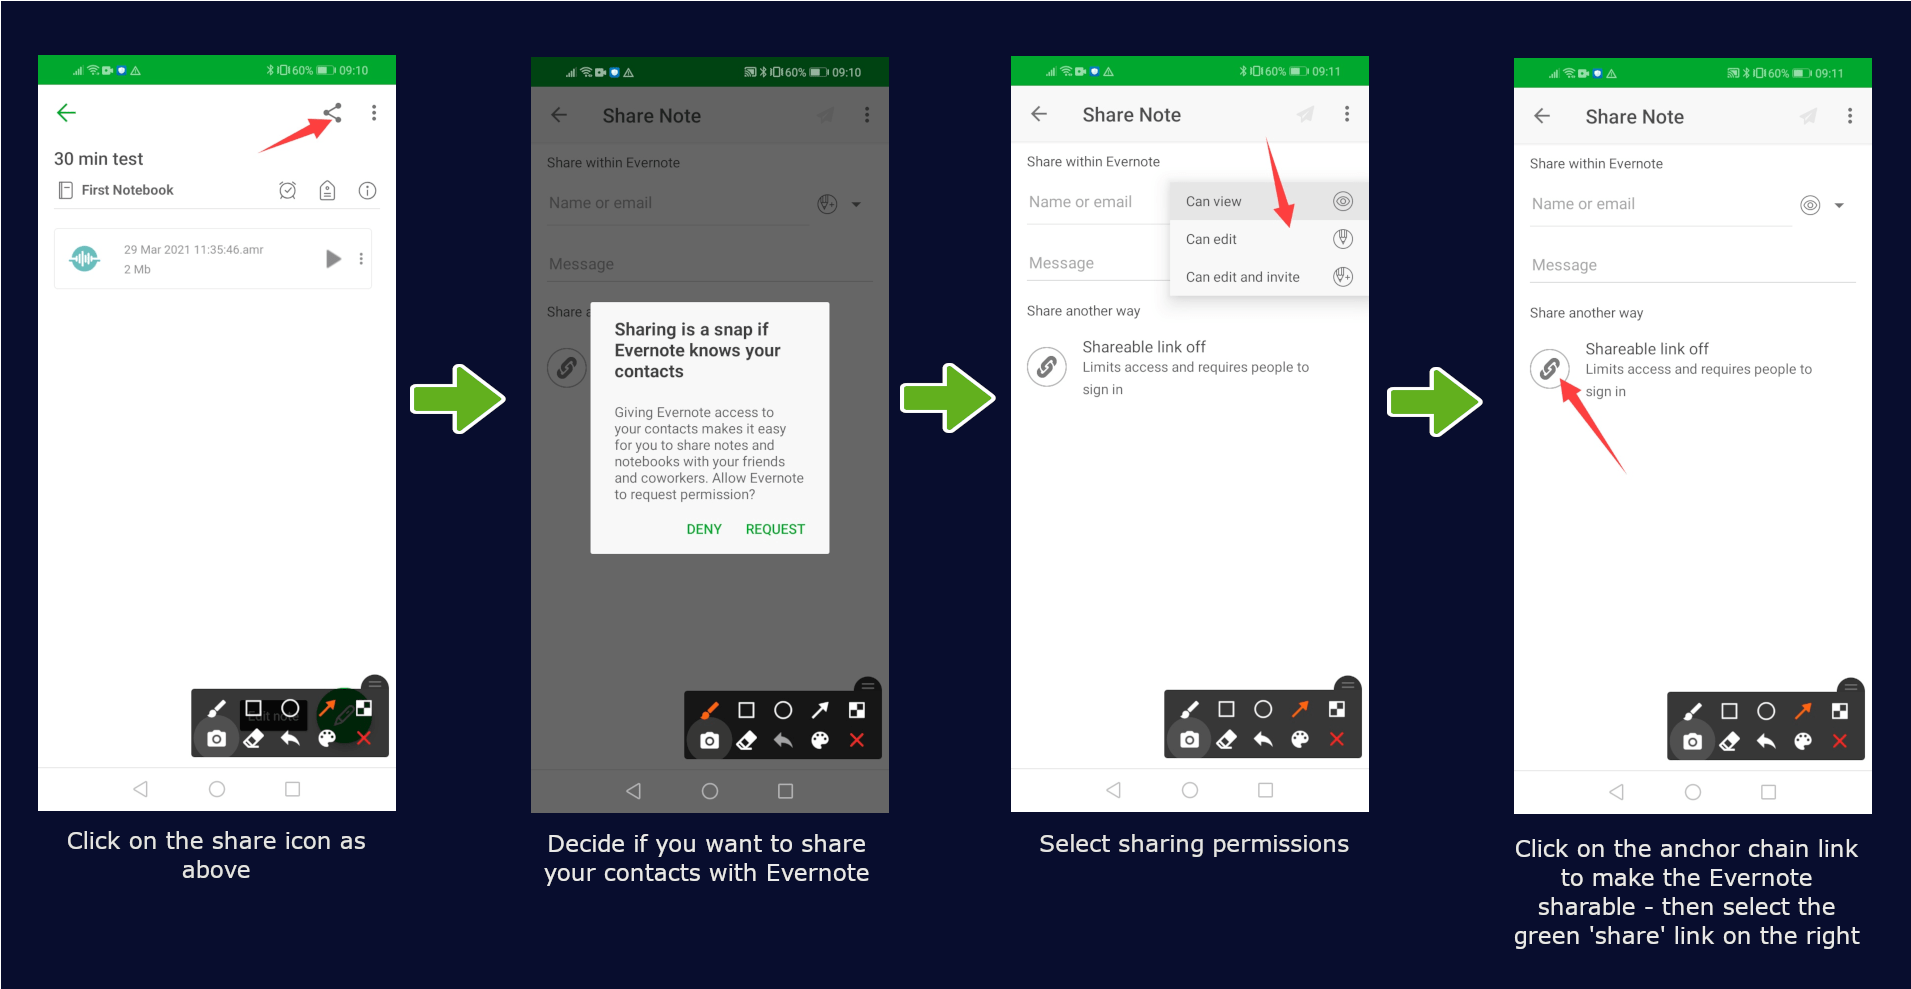
1. Open up the audio Evernote you want to share (or any Evernote)
2. Click on the Share icon, as illustrated in the below steps
3. Decide if you want to share your contacts with Evernote
4. Select the sharing permissions as required
5. Click on the anchor chain icon to activate sharing, then select the green ‘share’ link from the right-hand side
6. You will be then presented with a number of different sharing options
How to use Audacity to remove noise from an audio file
Have you ever recorded an interview or captured film and then found that in the editing process your audio file is distorted? This DIT hint will take you through some basic steps to help you clean up your distorted audio file.
The first point to make is that it’s always a good idea to firstly check all your recording equipment and microphone to ensure that they are setup correctly, so that clean audio is captured in the first place.
Sometimes it’s not that simple, you may be in a hurry or you may have forgotten to get a set of headphones to monitor the sound.
How to use Audacity to remove distortion
To try and make this easier, I will make available an audio file that I recorded with distortion that you can download yourself and have a play with to clean up.
(Please note that this isn’t perfect and the aim of this blog post is to provide a relatively quick and simple solution – if your audio file needs to sound professional, you’ll need to potentially re-record it using a professional microphone, such as a radio mic set)
1. To begin with, please download the following audio file: http://bit.ly/2mudRAO (note the content is irrelevant, please ignore what I am talking about!)
2. Open up Audacity, then go to File > Open > Select the downloaded audio from the location you saved it on your computer.
3. You should see a small waveform, play it and just listen to the distortion in my voice.

4. You need to firstly zoom into the waveform a bit because we’re going to select a small sample of the waveform for analysis – so go to View > Zoom in. (you may wish to zoom in two or three times)
5. Next click with the left mouse button and drag it over a small section of the waveform.
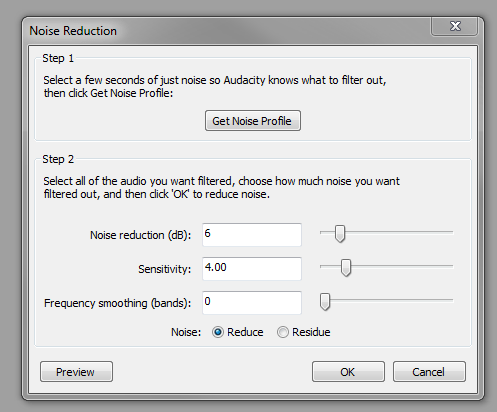
6. With the selected section, go to Effect > Noise Reduction. This will open the Noise Reduction pane and you then need to click on ‘Get Noise Profile’.
7. It may appear that nothing happens, but that’s okay. Now this time, go to Edit > Select all.
8. Go to Effect > Noise Reduction > At this point you’ll need to be wearing headphones so that you can listen to the audio previews. Leave the standard settings in step 2 and click on Preview.

At this point you may think that it still doesn’t sound too good. You’d be right! The advice I can give is to play with the settings in step 2 and keep previewing your audio file. It took me about three minutes to get the preview to sound acceptable and my settings can be seen below.
You may well be able to further improve this track by tweaking the settings and previewing the sound.
Have a go and when you’re happy click the OK button and it will process the changes.
How to lower the file size of videos
Have you ever captured a video either on a video camera or on your smartphone, then tried to upload the video to Edublogs, only to be faced with the below message?
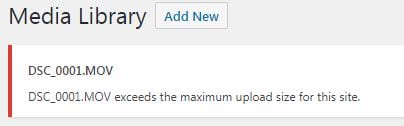
Whoops, you’ve exceeded the maximum upload limit… What now?
To fix this problem, follow the below steps:
1. Visit the following website and download the Handbrake software.
2. Once downloaded, open the software and you’ll see a batch option and a single file option, select the single file option

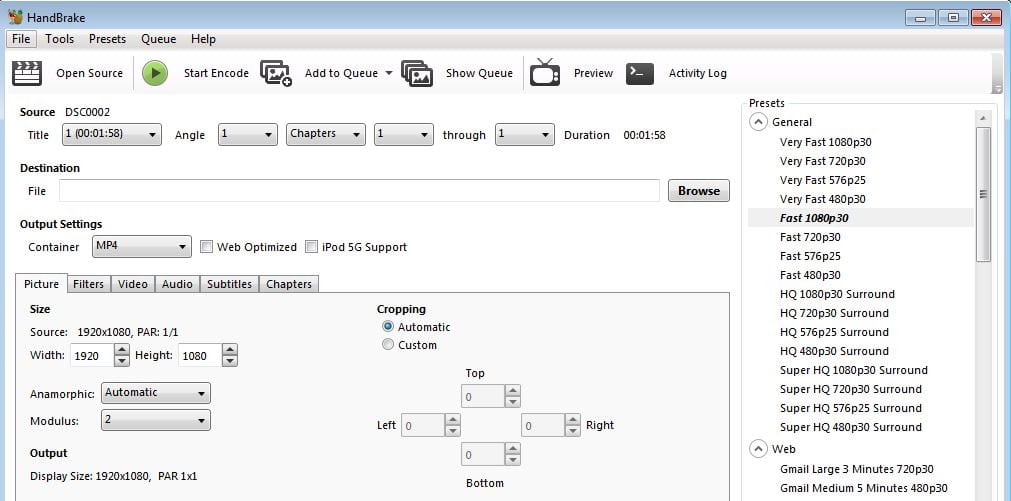
3. Open the large video file you want to reduce the file size for and the Handbrake editor will appear as below
![]()
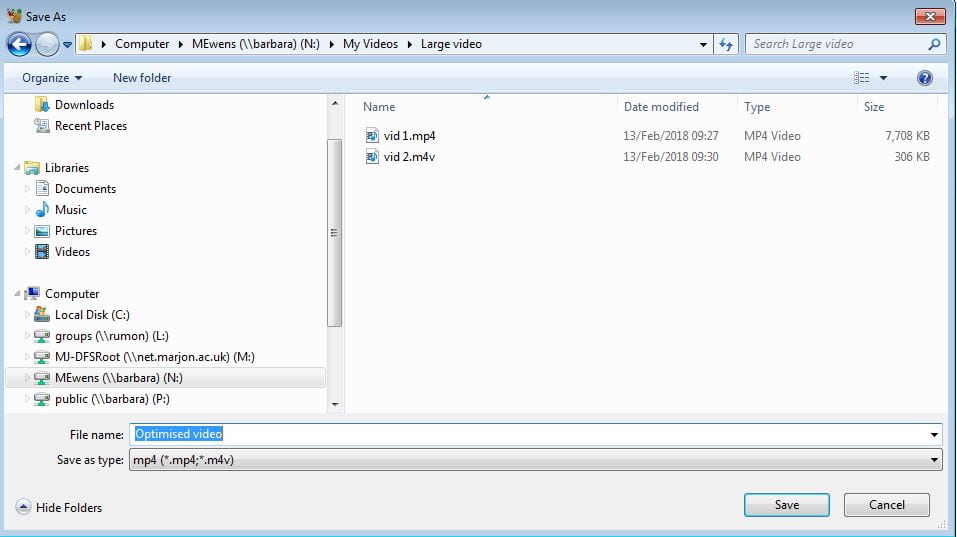
4. Select the above ‘Browse’ button and select the location where you’d like the optimised video to be saved and enter a file name, for example ‘optimised video’ and hit save.
5. You can select the ‘video’ tab to further reduce video size, using some of the advanced settings if you find the video is still too large, but if you just click on the ‘Start Encode’ button, this will usually reduce the file size as required. So just hit the ‘Start Encode’ button and Handbrake will process the video and when finished, your optimised video will be available to upload to Edublogs.

Need further help?
If you’re still struggling, why not watch the below video tutorial, which also contains advanced settings to help you further reduce video size if required.
