Welcome to Edublogs training and help support. Use this guide if you want to setup a new class and invite your students and also to learn how to use Edublogs.
Creating a class & invitation link
This guide has been created to help staff to setup their own classes for Edublogs and also show how to create an invitation link for students to join the class more easily. Quick guide for creating a class and invite
What is a class?
A class is a means by which staff can view every student blog from a particular module all in one space. It can be setup with specific permissions, which control whether or not students can see other student blogs. It also means that the teacher does not need student login information or any passwords to be able to see content, so security of information is ensured. A standard class will look something like this once it has been created and students have added their blogs.

Creating & class + student process
In future, staff should have the required skills to be able to do this themselves and this guide forms part of the how-to process.
1. Login to Edublogs
2. Click on ‘Get a Blog’
3. Follow the prompts for setting up your new site
4. For the Site name – enter the module code in lowercase followed by the year
5. For the Site title enter the module title and the year
6. Enter the required privacy (all student blogs will automatically be assigned with this privacy once they have joined the class)
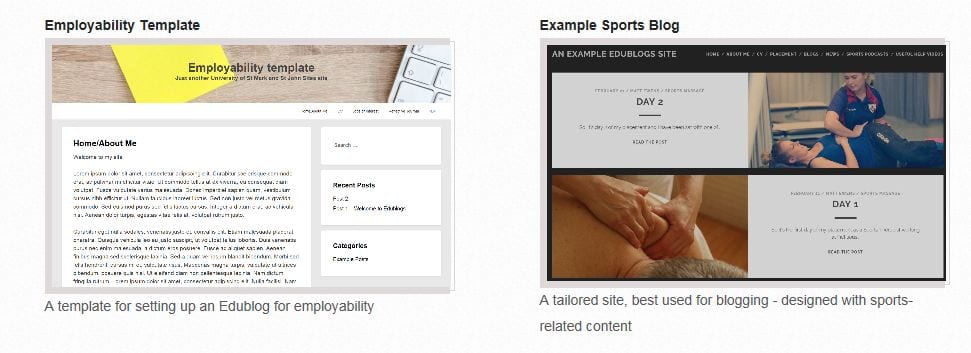
7. Select any template (it does not matter which as the site is simply a route to enable you to create a class)
8. Create Site

Note: If you get an error message at this point, it may be that someone has the same site name as you, go back to the top and edit the site name You will be redirected to another page and you should see a screenshot like the one below. Click on the link after ‘The site …. is yours.’ The site will then be created and once created you will automatically be sent to the dashboard for the site.

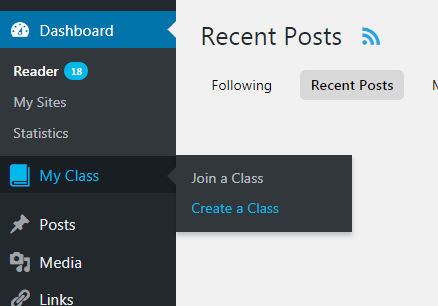
9. Within the dashboard of your new site you should hover your mouse over ‘My Class’ and select ‘Create Class’
10. Check the box ‘This is a class blog’
11. Leave the settings as default for the first two sections
12. Leave the rest of the settings and save your class
How to create a class invite link to invite students to join the class
1. You now need to create an invitation link for your students to enable them to be able to create their blog and join your class
2. Hover your mouse over ‘My Class’ > Select ‘Invite Students’

3. Next enter the invite name (no spaces – recommended format: Module code + Year) > Force a blog to be created once the students accept the invite
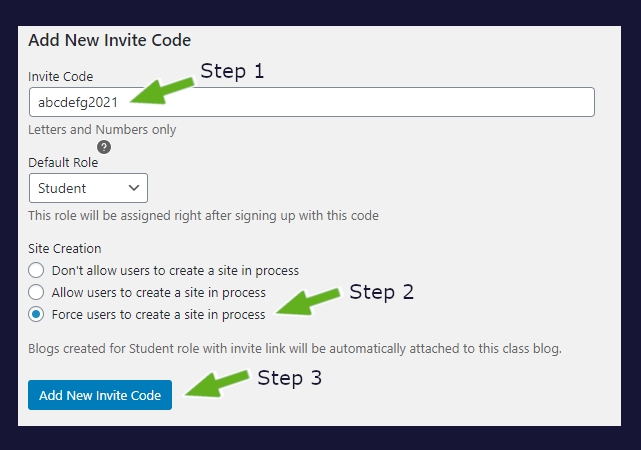
4. Click on ‘Add New Invite Code’ 5. The new link will appear on the right-hand side > Copy the link > send the link to your students

Students’ perspective
When students click on the invite link, it will take them to a page like the below screenshot (they will firstly need to login to Edublogs using their Marjon credentials– they will need to visit: www.sites.marjon.ac.uk ) – all students need to do is then enter their site title and name, then ‘Create site’
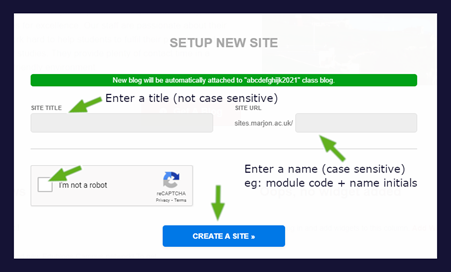
Once the student has entered the required details, they simply click on the ‘Create a site’ button and they will be taken into their site dashboard in Edublogs.
Their site will automatically be added to your class.
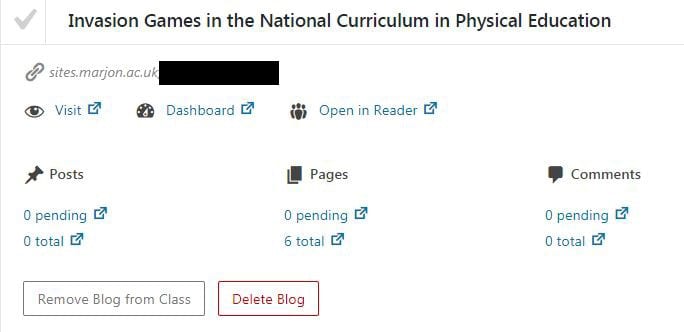
Managing your class & sites To manage your class, you need to login to Edublogs and navigate to the class site via the drop-down list under ‘My Sites’ > ‘My Class Blogs’ (If you can’t find the site, click into ‘My Sites and scroll through your site pages) 1. Go to ‘My Class’ and click on ‘Student Blogs’ 2. You will be taken to your class. (note if you have not done so already, there may be student blogs to approve on this page. If there are, approve them) 3. You will see x10 student blogs on each page and here you can view any blog by clicking on ‘Visit’ through each of the blog areas, as below: (note: there are no email notifications showing when a student has completed the class joining process)
Note: Students can only join one class at a time with one blog, they can’t join numerous classes with the same blog.
Class settings
If you need to check the permissions for privacy for the class, or for example you want to lower the level or privacy after the students have had their blogs marked for the purposes of reflection so the students see each other’s blogs – you can do this via the settings. 1. Hover the mouse over ‘My Class’ then click on ‘Settings’ This will enable you to alter the settings as required.
Adding other teachers to the class 1. To add other teachers to the class, go to ‘Users’ > ‘Add New’ 2. Search for the member of staff (if you use Google Chrome, when you start typing a name it should automatically appear) – or find the staff email address and type it into the search box. 3. Set the role to ‘Teacher’ and ‘Add Existing User’ 4. Navigate back to the class settings (My Class > Settings) 5. Save The member of staff will be added to the class. Just make sure that the ‘Teacher’ box is checked within the class, as below:
![]()
Resources
Watch an instructional video tutorial to learn more
Organising your Edublog sites
This resource will show you how you can organise your sites, whether staff or student.
As a member of staff, if you have a class you will see all your students’ blogs as a drop-down list under your ‘My Sites’ area. This can mean that the drop-down list becomes unwieldy and long.
If you are a student and have had to create blog sites for modules from previous years and have been subscribed into groups for previous work, then your drop-down list may also become long.
To remove old sites from your account, there are several options available. You can simply hide old sites, this means that if you need to revisit old content for ideas, you still have access to it. You can also remove old sites from your account and also remove yourself as a user from a site.
Hiding sites from your ‘My Sites’ drop-down list
1. Login to Edublogs
2. Click directly onto ‘My Sites’
![]()
3. You will be taken to all the pages that you are a user on or have created
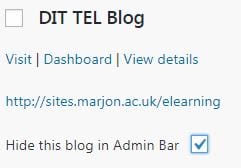
4. To hide any old sites from the drop-down list, simply check the ‘Hide this blog in Admin Bar’ box and then click on ‘save’ above and the sites will be hidden from the list. Go through all your sites until you’ve hidden all the old ones, leaving only the sites you need for your current modules.
Removing sites from your ‘My Sites’ drop-down list
You may want to clean up the list of sites from your ‘My Sites’ drop-down list in Edublogs. For example, if you were subscribed to your peers’ blogs during year 1 or 2, but in year 3 you don’t need to be anymore. The following steps will help you to remove yourself as a user on any blog you are subscribed to. Please do not delete sites as you may need to revisit them.
1. Follow steps 1-3 as above
2. This time check the box next to the title of the site that you want to remove
3. Go to the Bulk Actions drop-down menu and select your preferred option, so if you want to delete a site or remove yourself as a user from a site. Removing yourself as a user from a site is most likely option if you were subscribed to a group activity to see your group’s blogs.
Please note that if you delete a site it will archive it and the original creator of the site will not be able to access it. The preferred option if you are subscribed to someone else’s blog is to simply hide it from the drop-down list or select the ‘Remove me from selected blogs’ option.
How to create lists to help save time accessing classes
This blog post will help you to manage all your Edublog sites so that you can save time and save scrolling through lots of pages to find what you need.
If you still have too many sites in your My Sites drop-down list after removing sites from the list, you can create separate lists to help manage your sites. To do this follow the below steps.
1. Navigate to your ‘reader’ area (or click on ‘Dashboard’)
2. On the bottom right-hand side of the screen you should see ‘My Lists’

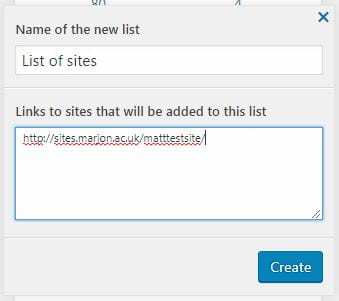
3. Click on ‘Create new list’ > add a title for the list
4. You’ll need to locate the URL class address for each class that you want to include in your list, do this by visiting the ‘My Site’s area and clicking. This will take you to a page showing all the sites that you are a user on.
5. Find one of your classes and copy the URL as in the example screenshot below:

6. Head back to your new list and in the bottom box add the URLs for any class sites that you want including in the list, separated by a carriage return and click on ‘Create’.
Once the list has been created, you’ll need to visit the settings to be able to see all the sites attached to it.

7. Click on the little cog icon for the list > You can then visit any site, by clicking on the chain icon. (not the site title)
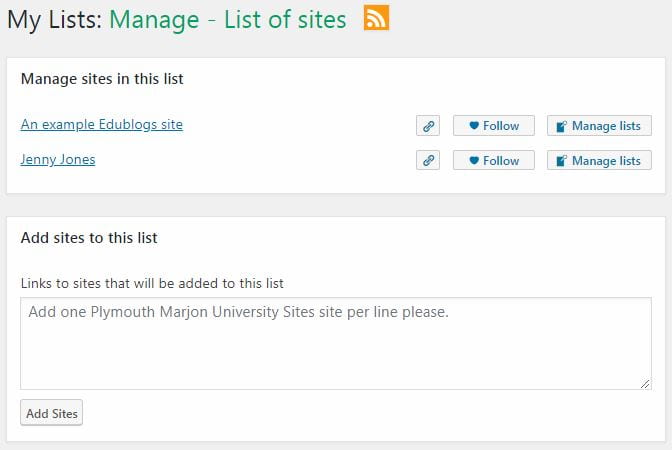
8. To add more sites, just copy and paste the URL into the ‘Add sites to this list’ box and click on ‘Add Sites’
You may like to then create a browser bookmark for your list page, so you can quickly access it. In addition, you may like to create multiple lists for different areas. The good news is that any site you switch to from your ‘My Sites’ area will always display your lists in the bottom right-hand side of the screen.
Resources
Watch the below screencast to learn more
Edublogs FAQs
Edublogs is the educational version of WordPress, which is one of the most popular online tools for creating websites/blog sites.
If you are using Edublogs as part of your assessment, you should head to the starter guide, which will guide you through the initial setup of your blog.
“I’ve logged into Edublogs, but my My Sites area shows a list of old blogs – how do I delete these?”
Answer:
Click on your ‘My Sites’ directly – this will show all your sites and you can simply check a box to hide any old site from the My Sites list. When you have hidden the sites you need to hide, click on save.
Visit the dedicated resource to find out more.
“I’m worried about privacy, can anyone see my blog?”
Answer:
If your blog is part of your assessment on a module then your blog should be attached to a class, the class will have been setup with the privacy. If you have concerns about privacy, speak with your tutor in the first instance. (most classes are setup so that your peers are unable to view your blog)
“How do I change the setup of my blog, so how do I have a set home page and a separate blogs page?”
Answer:
The standard configuration when you first create a blog is that any post you publish will automatically appear on your home page. To change this and have a static home page, you should first create your home page in the pages area. Then create another page called ‘Blogs’. If you then navigate to ‘Settings’ > ‘Reading’ – you can set your home page to the new static home page and the posts page to your new blogs page. This means that the home page would be set and all your posts would automatically be published onto your new ‘blogs’ page.
Watch a screencast to see how to configure your blog
“What are pages, what are posts – I don’t understand..”
Answer:
Pages are set or static, so they are non-collaborative. This means that unlike posts, nobody can leave a comment on them. Posts are collaborative, so comments can be made on posts. (any comments left on posts are not published until you approve them)
The purpose of posts in general is to capture record your reflective experiences, for example if you are on a work placement and want to keep a daily record of what you’ve been doing on the placement. Very useful for revisiting and reflecting on the experiences to help aid your learning and understanding.
Watch a screencast that explains the above in more detail
“How do I change my menu, I don’t want every page to automatically appear in my menu..”
Answer:
Every new blog will automatically be setup so that any new page or post created will be published on your blog. If you don’t want this to happen, you can control exactly what you want by creating a custom menu. Follow the below screencast to learn how to do this.
Watch a screencast to learn how to create you own menu
“How do I change the picture at the top of my blog?”
Answer:
To change the picture at the top, known as the ‘header’ image – you’ll need to head to ‘Appearance > Customise’ – Then depending on the template you’re using – there should be an area called ‘header image’ or ‘header’. Click on this and you can ‘hide’ the template example image then ‘add’ your own. Once you have added your own image, save and publish. (note: use copyright free images from sites like www.pixabay.com or your own images)
“How do I change the template for my blog”
Answer:
You can change the template by visiting ‘Appearance’ > ‘Themes’. You’ll have the option to see a ‘live preview’ for any new template. If you like the template, simply save and publish.
Watch a screencast to see how to do this
“If I visit my live blog site, how do I get back to the editor?”
Answer:
When you visit your live site, you can easily get back to the editor or dashboard by clicking on the icon that looks like a speedometer.
You may also want to explore the screencast for working effectively
“I’m seeing other people’s posts when I login to Edublogs, what’s going on?”
Answer:
When you first login to Edublogs and visit your dashboard, it will automatically display and posts from other bloggers that have chosen to make their blogs public. If your blog is not setup as part of a class, you can control the privacy via ‘Setting’ > ‘Reading’
If you have any concerns about seeing your peers’ blogs as part of your module, speak to your tutor in the first instance.
“How do I find out what’s supposed to go on my blog?”
Answer:
You should have all the guidance you need through the relevant module page on LearningSpace. There should be an ‘assessment’ area, this should include details and guidance to help you construct your blog.
If you have any concerns about what’s supposed to go on your blog, speak to your tutor in the first instance.
Complete Edublogs guide for staff
Staff will need to be equipped with the necessary skills to create and manage their Edublogs classes. To help staff and provide them with the skills required, we have created a new guide as well as the below tutorial videos.
The Edublogs guide will enable staff to:
* create their own classes
* show how to clean up sites
* manage their classes, including students/teachers
* perform basic editing and blog content creation
* change the customisation options
* see how different menu systems work
* understand blog setup and the differences explained
Tutorial walkthroughs on basic blog setup (useful for tips on blog creation, editing content and settings)
