Welcome to Microsoft Teams training for students – you should find everything you need here to get started and use Teams effectively. We’d recommend that you go through all the ‘essential skills’ resources as a minimum requirement. Additional skills have then been provided to go through useful skills like how to run breakout rooms and accessibility options.
Essential skills
Download the Teams app
1. Login to your Microsoft Office account online via office.com (Marjon username & standard password)
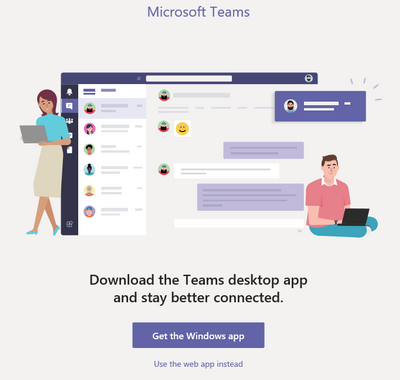
2. Visit the Teams space – if this is the first time you are visiting Teams the image may look like the below
3. Select the ‘Get the Windows app’ button and follow the prompts to download and install the software on your machine
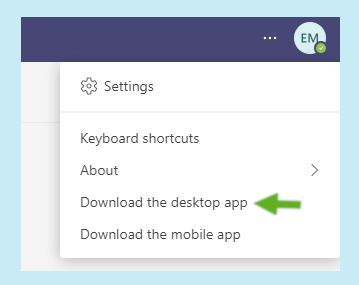
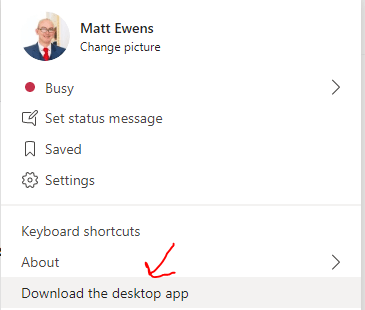
4. If you have logged into the Teams space online, then you can download the app by clicking on the three dots as below
Resources
Watch an instructional video tutorial to learn more
Learn a basic understanding of the platform
In general most of your Teams interactions will take place in the ‘Chat’ space between individuals and the ‘Teams’ space. The Teams space is where you should hold module-based Teams sessions or meetings. Each module will have its own Team for each academic year.
1. From within Microsoft Teams, head to your specific Teams area and visit one of your module teams.
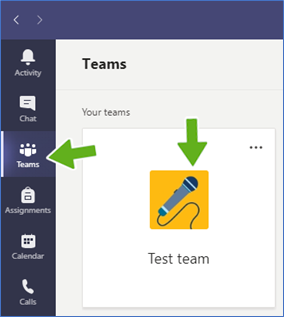
2. The diagrams below show the description of all the basic functions in your team space. The ‘General’ channel is where most of your interactions with students will take place.
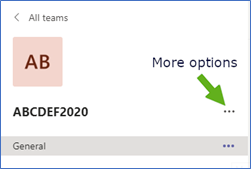
Profile and channel options
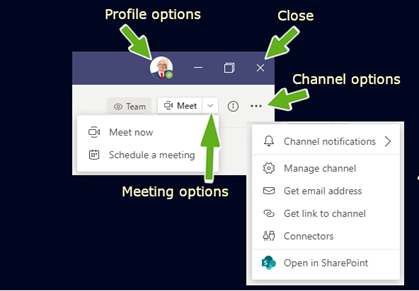
Conversation toolbar
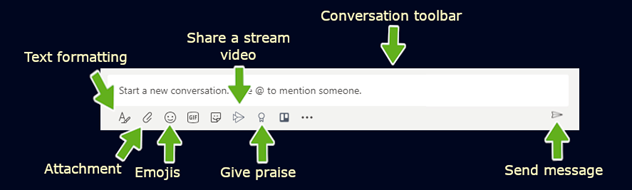
3. Have a go at sending a message to a Team or colleague, simply type in the space and either press the return key on your keyboard or click on the ‘send message’ button as illustrated above.
4. At various points in your Team space you’ll see the three dots icon, this is related to more options.
5. On the top of your team space, select ‘Files’ > this is a useful space where your lecturer may upload documents and folders.

Tip: Clicking on ‘General’ will always take you back to the conversation posts wall
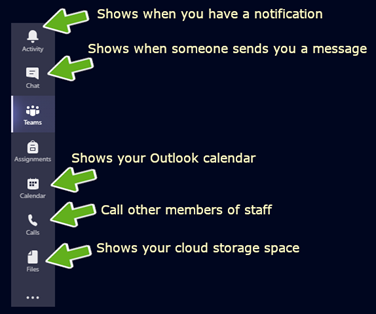
6. Finally, the toolbar on the left-hand side of the screen will also enable you to access a general chat area outside of your Team. This includes a calling feature, so you can call people and also your calendar, which is linked to your Outlook calendar. (this can also be used to setup Teams meetings, which you can also do from within Outlook)
The diagrams below show the above features with an overview of the options available:
Resources
Watch an instructional tutorial to learn more
How to join sessions/lectures using Microsoft Teams
If your lecturer has sent joining instructions (within your Canvas module page) for a Teams session or sent a direct email invitation (see below), this post will help you.
Joining a session/lecture via a direct email invitation
If you have received a direct invitation to join a session/lecture through Microsoft Teams, please follow the guidance in the below tutorial which will help you to login and access the session. The below video will explain how to download the Microsoft Teams desktop application and how you can join an online session/lecture or meeting. (you may also have lecture content via Panopto, so seek advice from your lecturer in the first instance)
You should follow the below instructions as they will help you to have the best experience of using the Microsoft Teams tool. (if you don’t have an email invitation, then watch the other video via a joining link)
Joining an online session/lecture via a joining link (not via email invitation route) – From within Canvas
To access an online session/lecture via Microsoft Teams with a joining link (not email invitation), please follow the below video tutorial. This explains how to download Microsoft Teams and how you can join an online session/lecture or meeting in Teams. (you may also have lecture content via Panopto, so seek advice from your lecturer in the first instance)
You should follow the below instructions as they will help you to have the best experience of using the Microsoft Teams tool.
Instructions
How to download the Microsoft desktop application.
1. Login to http://www.office.com and sign in using your Marjon credentials
2. Once you have logged in, click on the Microsoft Teams app

3. Once Teams has opened, head to the top right-hand corner and click on your profile
4. Scroll down the list and click on ‘Download desktop app’
5. Once downloaded, install the software onto your computer (note: if using a mobile device, you’ll need to download and install the mobile Teams app)

To join an online session/lecture via a joining link (not email invitation)
1. When the desktop Teams app is installed, you’re all set and ready to join online sessions in teams.
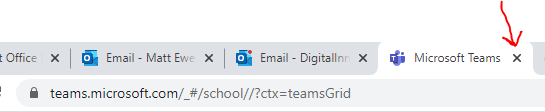
2. Close down any browser windows with Teams open
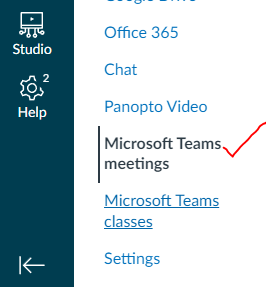
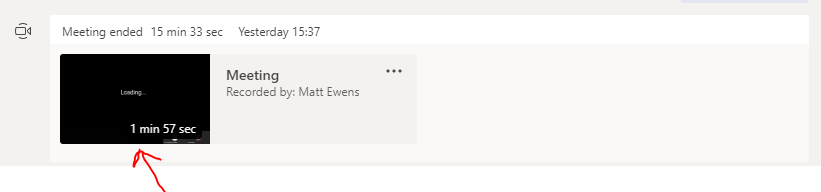
3. If your lecturer is utilising the Microsoft Teams Meeting space in Canvas, you should be able to visit this to see any meetings:
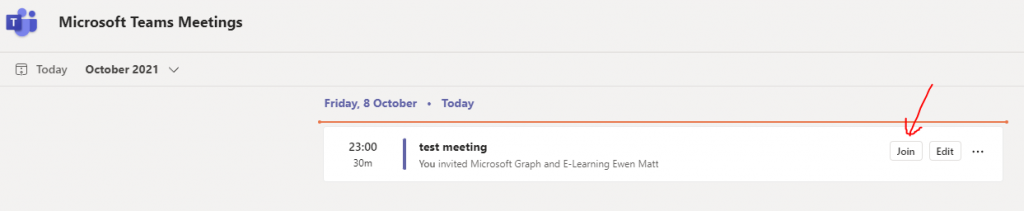
4. Any meetings will show in this page as follows:
5. Note that your lecturer may have emailed you a joining link or this may be displayed on the module page in Canvas (announcements). Seek guidance from your lecturer as to how to join the Teams session. The joining link may also look like the below screenshot (if emailed to you):

4. Make sure you have the Teams desktop app open, then when you are ready to join the Teams session, click on the joining link and the session will open in your Teams app
To join an online session/lecture via a direct email invitation
1. When the desktop Teams app is installed, you’re all set and ready to join online sessions in teams.
2. Close down any browser windows with Teams open
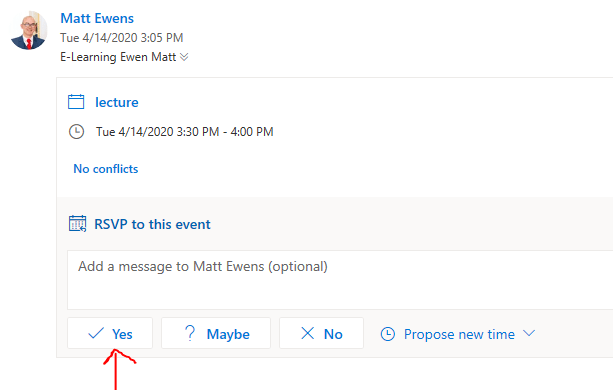
3. Head into your email and you should see an email inviting you to the event. Click on the email and accept the invitation by clicking ‘Yes’.
4. This will now add the online session/lecture into your calendar. To view the session, click on your calendar (You can change the RSVP if something comes up and you can’t attend and you can also find the joining link when you’re ready to attend.
5. The default notifications will send you a reminder 15 minutes before the event is due to start.
6. Click on the ‘Join Microsoft Teams Meeting’ link to join (ensure you’ve first downloaded the desktop application and logged in or if using mobile, download the app)
Tips on lecture etiquette and using the toolbar
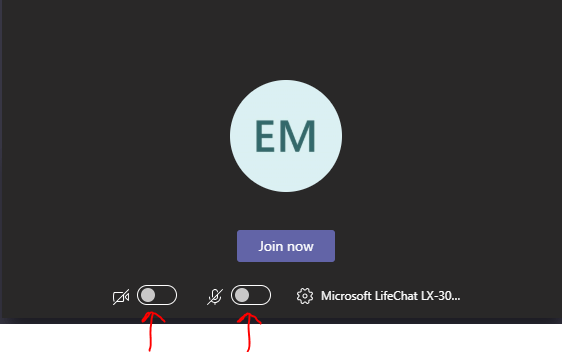
1. Switch off your camera and microphone prior to joining the session as this helps reduce background noise for your lecturer. (seek guidance from your lecture about speaking once you are in)
2. Once you have joined the session you may see the lecturers screen or presentation and you’ll have further options available via the toolbar. (you’ll need to wiggle the mouse to activate it or on mobile, it’ll automatically appear)
Toolbar:
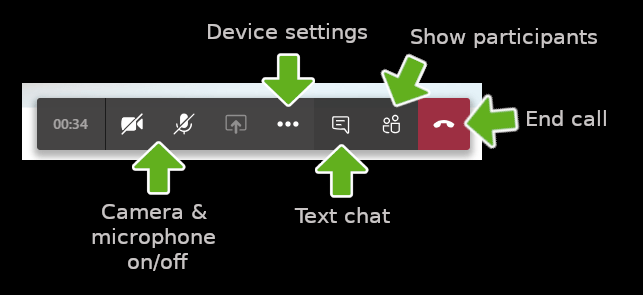
Camera & microphone on/off = toggles on or off mode for camera/mic
Device settings = Can be used to check your sound/microphone input
Text chat = For having conversations with other people in the lecture/session or for asking questions (uploading files, etc)
Show participants = See who is attending the session/lecture
End call = Hang up and leave the session/lecture
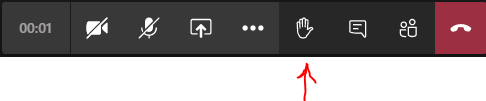
NEW Feature: Raise your hand – a recent update means that you can now raise your hand during a session, this will alert your lecturer that you wish to ask a question or have a problem. To raise your hand just move your mouse and click on the hand icon from the toolbar.
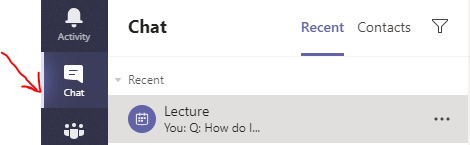
3. Once you have ended the call if you are logged into Teams you’ll be able to access the chat for the session and any completed Teams recordings. (note these may take time to process, so won’t be available immediately) – speak to your lecturer if you are unsure where the recordings are located.

Further support
If you have any technical issues accessing your online sessions/lectures please let us know and we will try to help.
Additional skills
How to hide your web cam background
1. Login to Teams and activate your meeting
2. Before entering the meeting, click on the ‘Background filters’ option

3. You will see a number of background options, click to add one
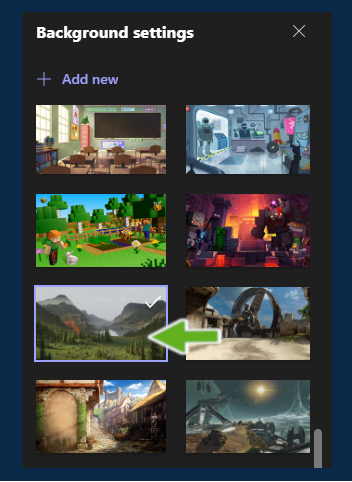
4. Alternatively you can also upload your own background by selecting an image from your computer
5. If you have already joined your meeting, you can also change your background by clicking on the three dots (more options)

6. Then select ‘Apply background effects’
Resources
Watch an instructional video to learn more
Accessibility: Automatic captions & the immersive reader
Automatic captions
1. Activate your teams meeting or session
2. Direct your students to select the three dots or more actions/options in Teams (note this service is not available if using Teams in the browser)
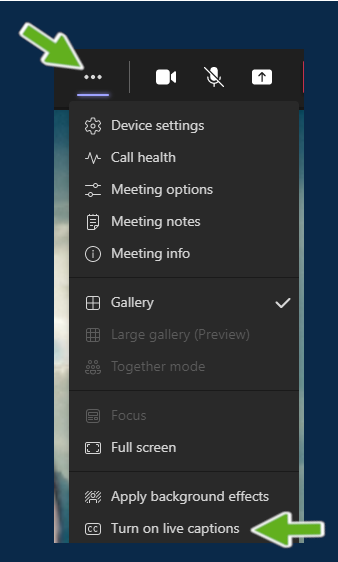
3. Switch on ‘Turn on live captions’
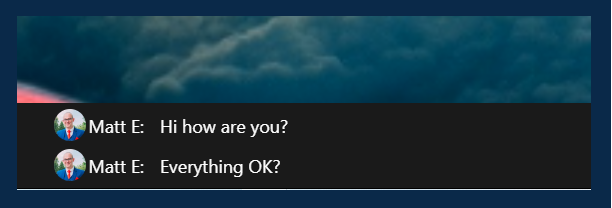
This will convert all speech into text that will appear within a bottom bar on the screen as below:
Resources
Watch an instructional video to learn more
The immersive reader
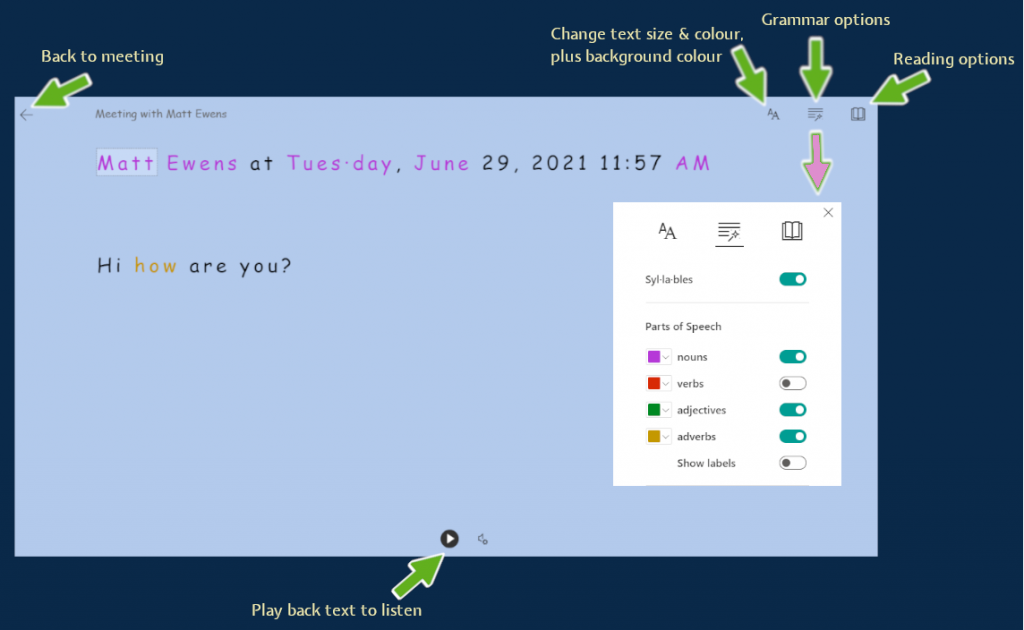
The immersive reader can be used by any student to view text in a more accessible way. So when the student activates the immersive reader they can make the text larger, change the background colour and also play back the text, which will read out all text chat.
1. Hover the mouse over any chat text content & click on the three dots
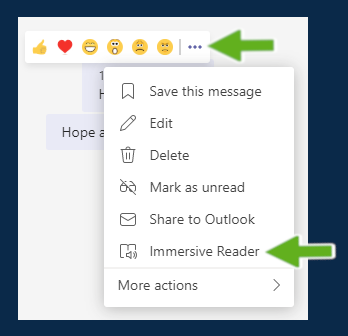
2. Select ‘immersive reader’
3. This will load the immersive reader as shown in the below key
Resources
Watch an instructional video to learn more
Message formatting & importance
In-meeting message formatting
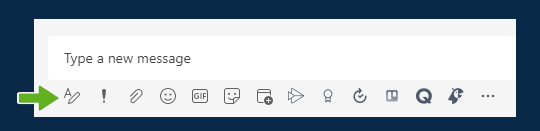
Did you know that before you send any message in a chat space, you can format the text, add images, links or headings?
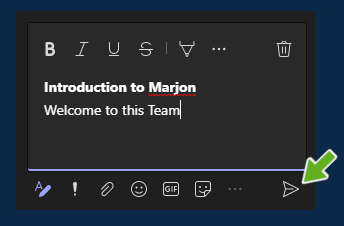
1. Before you type you message, click on the formatting icon
2. You can now format any text to make it bold, italic, underline, etc. You can also click on the three dots (more options) to add hyperlinks, tables, headings, increase the font size & more as below:
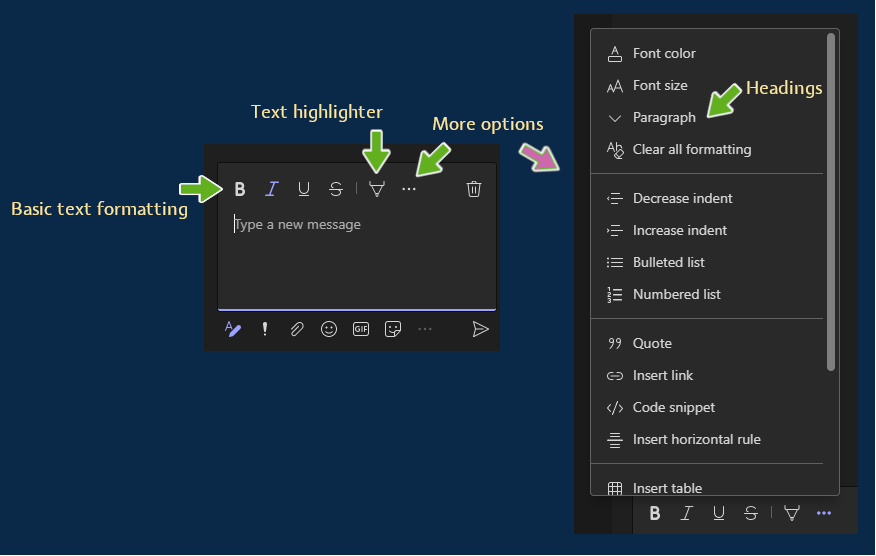
3. When you have completed the text formatting, click on the send button
Resources
Watch an instructional video to learn more
