How to use Marjon Canvas & Panopto to capture lectures
We are no longer using the automatic lecture capture system (linked to timetable). Instead, teaching staff need to record their own lectures by launching Panopto from within their Canvas module courses. The new method with Marjon Canvas is to navigate to your Marjon Canvas course and visit the ‘Panopto Video’ space for the course you are capturing. From here you will create a new recording which will launch the familiar Panopto Desktop recorder.
View and download the guide or read on and watch the video to see how this works:
Recording lectures with Canvas Panopto Guide
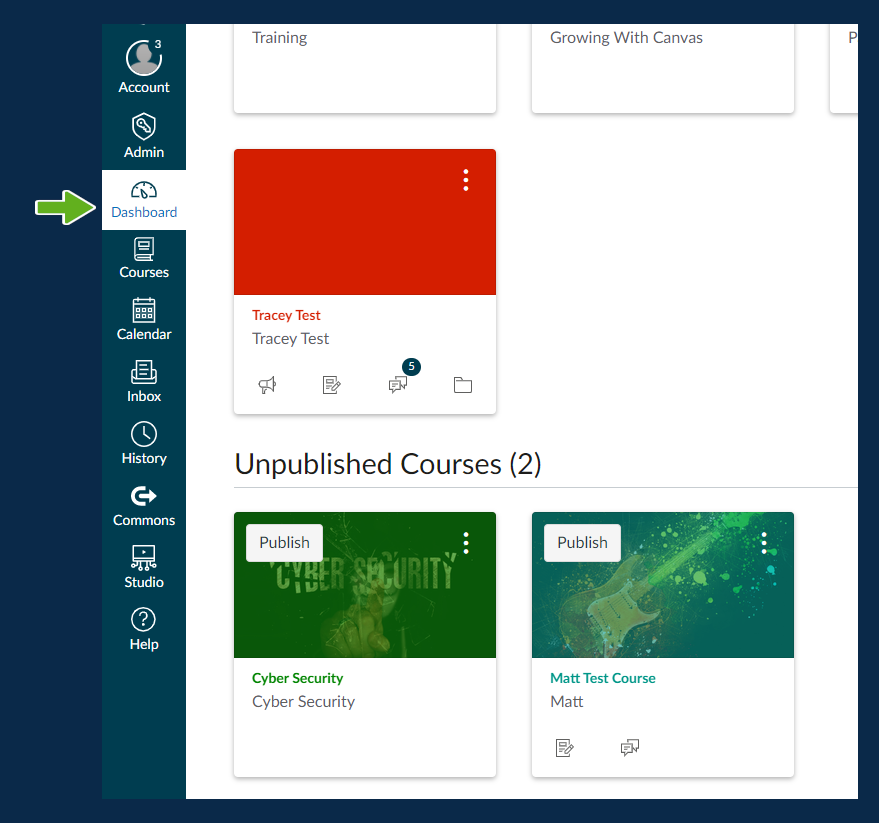
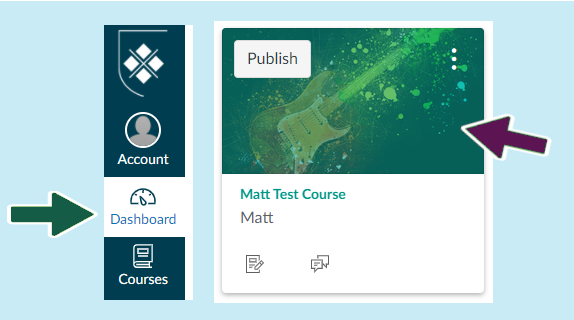
1. Login to Canvas and visit your Marjon Canvas course
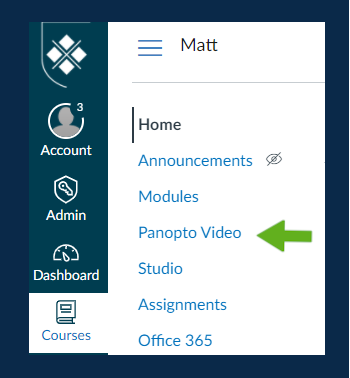
2. Click on ‘Panopto Video’
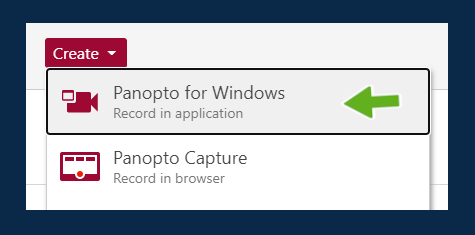
3. Click on ”Create’ > ‘Panopto for Windows’
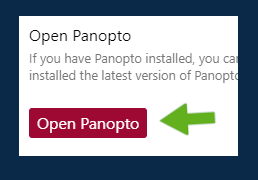
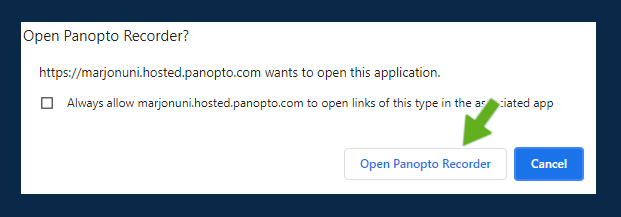
4. Click on the ‘Open Panopto’ (note: if you don’t have the Panopto Desktop recorder installed on your machine, you will need to contact a member of the Computing Services Team)
5. Open your PowerPoint presentation, then ensure the settings are as below (note, click on the tab to show ‘PowerPoint’)
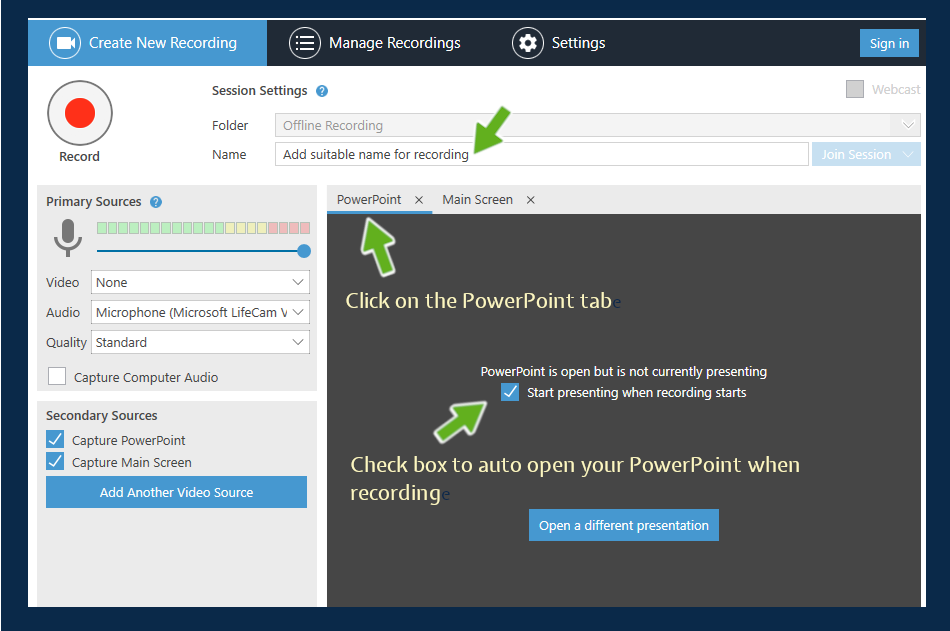
6. When you are ready, simply tap on the record button and you PowerPoint will automatically go into present mode
7. When you have completed your recording, simply press the ‘F10’ key or navigate to the desktop recorder and press the stop button. (note, make sure you leave the desktop recorder open whilst the recording is processing)
8. If you navigate back to your Marjon Canvas course (or if already on the page refresh the browser) – you should see the lecture processing
Resources
View/download guide Recording lectures with Canvas Panopto
Watch a video tutorial to learn how
How to create an assignment folder for student video uploads
What is an assignment folder?
Assignment folders are used for assessment and enable students to submit their videos to your Marjon Canvas course. The main benefit of this is that your students will not be able to see each others videos and they will be private and only visible to you as the tutor on the Marjon Canvas course.
1. Login to Canvas and visit your Marjon Canvas course
2. Click on ‘Panopto Video’
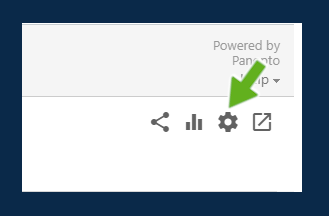
3. Click on the cog icon on the right-hand side
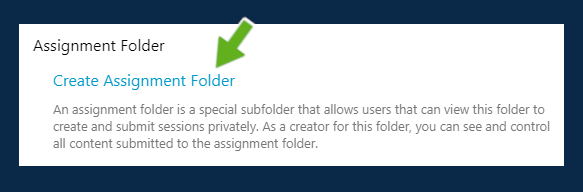
4. Now select the link ‘Create an assignment folder’
5. The folder will be visible once you close the pop-up box down as a tab
Watch a tutorial video to learn more
Panopto trouble shooting guide
This trouble shooting guide has been put together in response to ‘issues’ that have been shared with us. Read through on this page or view and download the guide by clicking the link below.
Panopto – Troubleshooting Guide
My recordings are all going into ‘My Folder’ and not to the individual module folders
This will be due to launching the Panopto recorder outside of Canvas – i.e. from the desktop. To make sure your recordings appear in the relevant Canvas Panopto Video folder, you need to launch it from within the Panopto Video folder of the module course that you’re delivering a lecture on. Open the Panopto Video folder, then click Create – Panopto for Windows – Open Panopto – Open Panopto recorder.
My recording has sound but no slides
A secondary source (PowerPoint and/or Mainstream) needs to be selected before you begin recording or the recording will capture audio only.
I recorded a session, but it has only captured the first part
The most likely reason for this is that you have inadvertently pressed the F10 key which will have stopped the recording. (F8 = start recording, F9 = pause/resume recording, F10 = stop recording)
Panopto has captured my slides and audio but none of the websites or video clips that I’d linked to?
If you want Panopto to capture content other than your presentation, you need to select PowerPoint & Main Screen as Secondary Sources
Students are denied access to a Panopto recording
If the recording is from last year, the share permissions need to be changed to allow access to anyone logged into Canvas who has the link:
I can’t access recordings from previous years in Canvas
Recordings captured before September 2021 belong to accounts linked to LearningSpace, so totally separate accounts. It is possible to merge accounts to have access to previous years recordings from the Panopto Video folders on your Canvas module course pages. You can request this by emailing digitalinnovation@marjon.ac.uk – Please include Panopto Merge in the subject line.
I can’t get this recording to move past processing
The most likely reason for this is that the laptop has been shut down before Panopto has completed upload and processing.
My recording has uploaded but says ‘No content available’
(As above) – The most likely reason for this is that the laptop has been shut down before Panopto has completed upload and processing.
IMPORTANT! Never shut down a room laptop. Everything is wiped when the laptop is restarted or shutdown including any Panopto recordings that are still uploading!
Capturing Static Presentations using Panopto Capture
Panopto Capture, is a browser-based screen capture tool. This tool can be used to capture anything on your screen, including your PowerPoint presentation. This guide will show you how to use it and makes for a useful alternative should you experience any issues with the Desktop Recorder.
Capturing your PowerPoint presentation
1. Login to Panopto, by visiting: https://marjonuni.hosted.panopto.com (use your Marjon credentials)
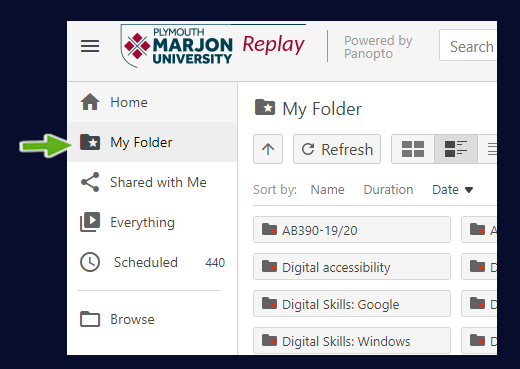
2. Determine where you would like to capture your presentation by either selecting your ‘My folder’ space (this is your personal Panopto space, useful for capturing and uploading tutorial videos or teaching resources) – or browse to the location of the module page, if you wish to have your recording saved to a specific module.
3. Next, select the ‘Create’ button and click on ‘Panopto Capture’
4. You should see a similar view to the below screenshot (more detailed explanation will be provided in the video tutorial)
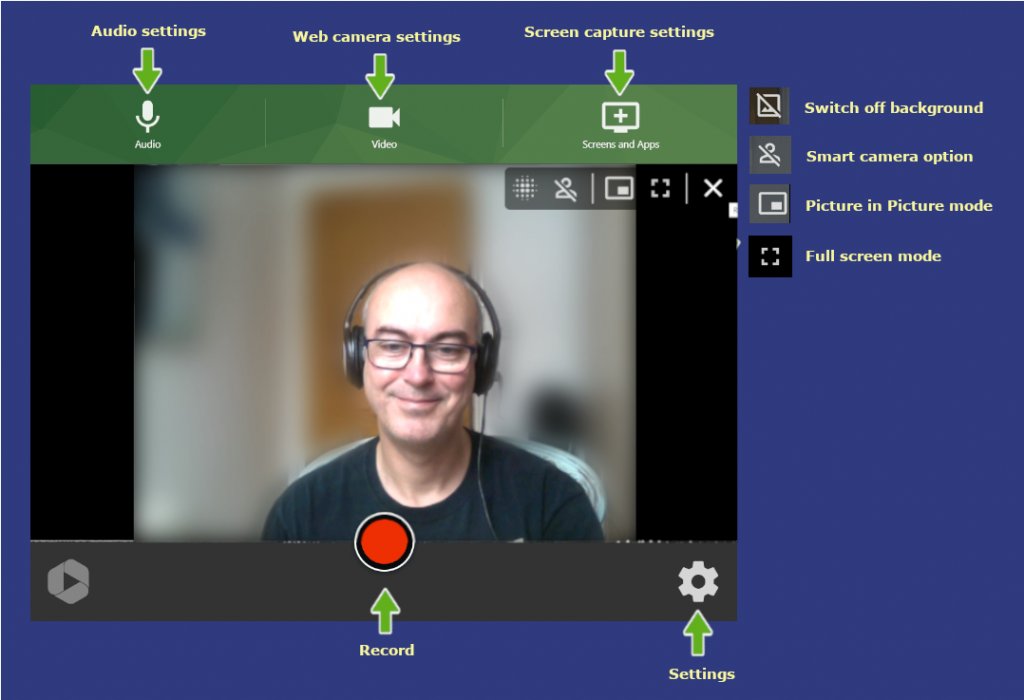
5. If you don’t want to display your web camera, click on the ‘Video’ option and then click into the screen to deactivate it

6. Check your audio settings are set to the correct microphone, then open up your PowerPoint presentation
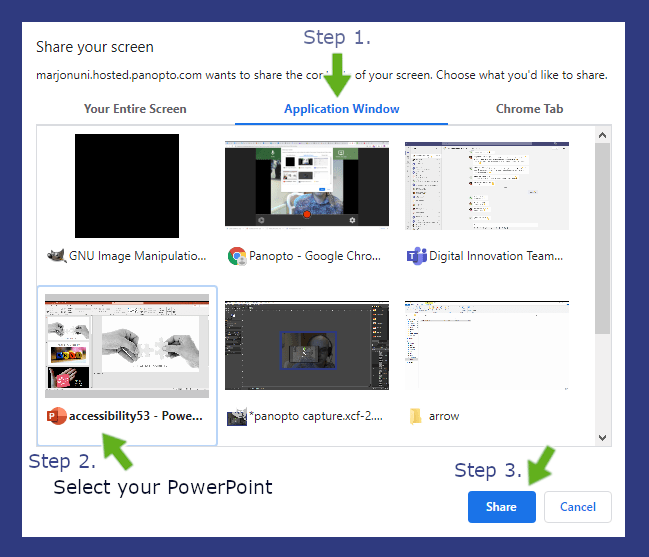
7. Next, click on ‘Screens and Apps’ and select the middle tab ‘Application Window’
8. You should see a number of open boxes displaying the applications you have open on your computer. Find the PowerPoint window and click on it > Then select ‘Share’ (note there are a number of screen sharing options, the default is set to ‘Your entire screen’ this would be useful for capturing your presentation and anything else you wanted to present. Note, selecting only one application window will only capture that window)
9. Note, you will automatically be taken to your presentation > Instead of presenting the PowerPoint go back into the Panopto Capture tool and click on the record button (the 5 second countdown will activate)
10. Navigate back to your presentation and tap the F5 button or go to ‘Slide Show’ > ‘From Beginning’
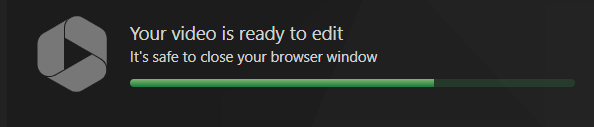
11. When you have completed your presentation, go back into the Panopto Capture tool and stop the recording. Wait until you see the success message before closing the window or your presentation may not upload correctly or at all
Tips:
If you need to not only capture your PowerPoint presentation but also want to capture a YouTube video for instance, then you’ll need to select the ‘Your Entire Screen’ mode when screen sharing. This will enable you to navigate from your PowerPoint to the YouTube video. Then other important point is SOUND. To be able to capture the sound output from the YouTube video and enable your audience to hear that sound, you will need to ensure that the ‘Share audio’ box is checked. You will also need to ensure that you have set your web camera as your microphone and the output sound from the YouTube video will need to be outwardly playing from your computer speakers. (more detail will be covered in the instructional tutorial video below)
Watch the instructional tutorial video to learn how
Additional resources
Want to include a web camera and capture your PowerPoint or screen at the same time?
The below video will show you several methods, whether using Microsoft Stream, Panopto or Canvas Studio.
Editing a captured session
Panopto will enable you to edit any captured session, this resource will show you the basics of trimming sections in your recording.
1. Login to Canvas and visit your Marjon Canvas course
2. Click on ‘Panopto Video’
3. You should see all your recorded sessions, hover your mouse over the recording that you need to edit and click ‘Edit’
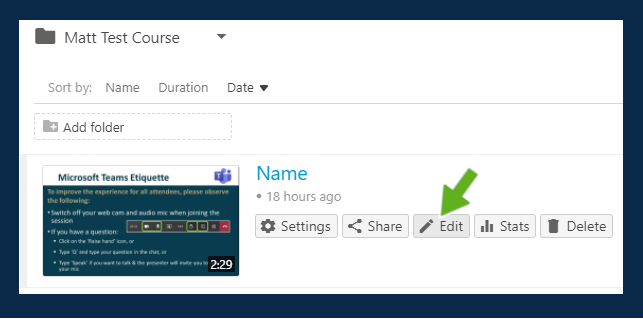
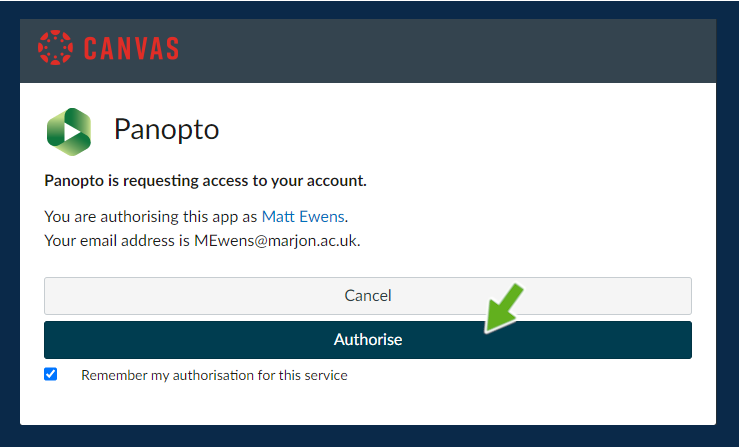
(note, you may need to login to Panopto separately, make sure the login is set to ‘login with Canvas’ & authorise)
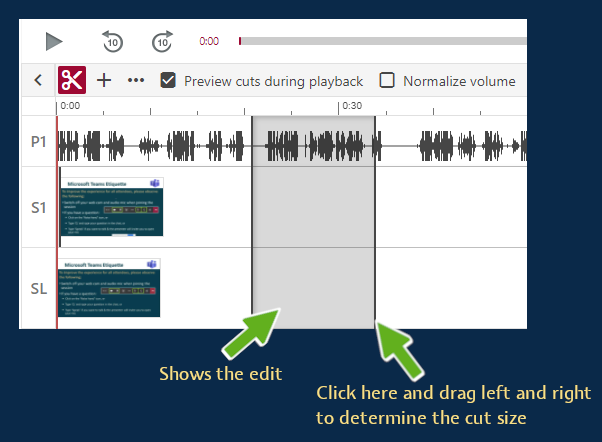
4. You should be taken into the Panopto editor – by default the timeline tool is set to scissors for editing your video content. To remove a section of the video, simply click into the timeline and hold down your mouse button and drag it to the end of the cut.
5. You can perform multiple cuts in your recording, then when you are ready, click on the ‘Apply’ button.
6. Accept the pop-up message that appears and then you can navigate back to your folder and you should see your recording processing the edits.
Note: The cuts in your recording are not deleted, they are simply left out of the finished recording. So you can revisit the editor at any time to change the cuts as you need.

Resources
Watch a tutorial video to learn how
How to enable closed captions for videos
In Panopto you can easily enable closed captions, follow the steps below to learn how:
1. Login to Canvas via: https://marjon.instructure.com
2. Head to the course where you want to add closed captions to your video
3. Go to your Panopto video space
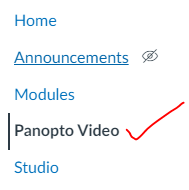
4. You should see all the videos attached to the module > hover your mouse over the video that you want to add closed captions and click on ‘Edit’
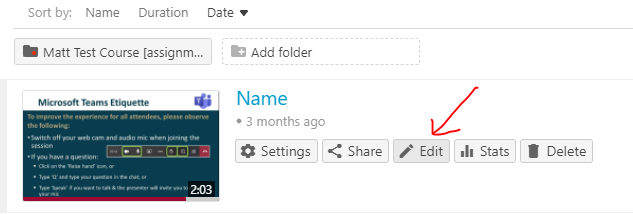
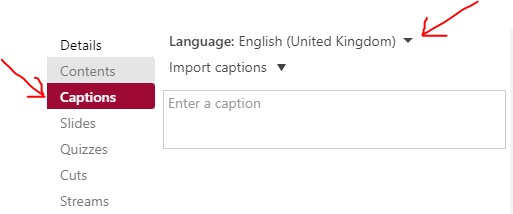
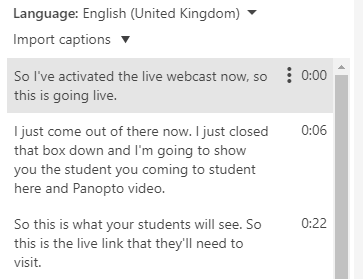
5. The editor will load up > Now click on ‘Captions’ and select ‘United Kingdom’ from the languages drop-down
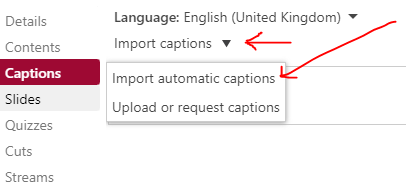
6. Now click on the ‘Import captions’ drop-down menu and select ‘Import captions’ > ‘Automatic captions’
7. You will see the captions appear in the box. If you need to make any edits, simply click into the caption to edit the text.
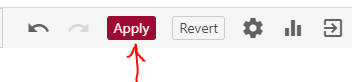
8. When you have made any edits, click on the ‘Apply’ button to save.
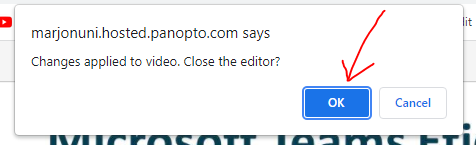
9. Make sure you click on the ‘OK’ button to proceed.
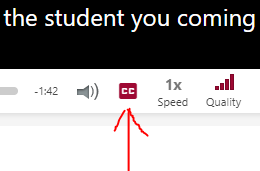
10. In order for students to activate closed captions on the video, they simply need to click on the CC button as below:
Resources
Watch a tutorial video to learn how
How to get a text transcription for any video
Thankfully, video captioning has improved greatly in recent times. Automatic captions for the most part are quite accurate and with Panopto you can now not only add automatic video captions, but download a complete text transcription of them as well.
To find out how to do this, follow the steps below:
1. Access Panopto by visiting the following website address: https://marjonuni.hosted.panopto.com/
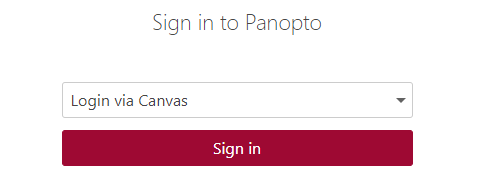
2. Login using your standard Marjon credentials (select Login via Canvas’) * note: you will still have access to recordings made in LearningSpace if you change the login box to LearningSpace. If you wish you can request for both accounts to be merged, please contact digitalinnovation@marjon.ac.uk)
3. Click on ‘My folder’ to access your personal video cloud storage space
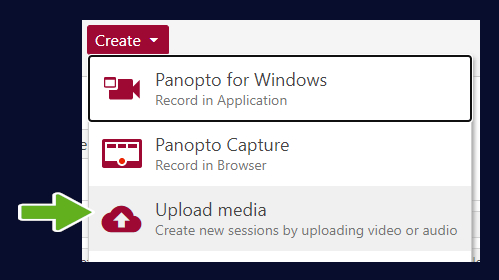
4. To upload a video or audio file to your ‘My Folder’ space, click on the ‘Create’ button and select ‘Upload media’ (either drag and drop your file into the space, or click and find it from your computer)
5. Wait until you see a success message and then close the box down. (For long videos you will need to wait until the video has completed processing before heading the next step)
6. Once your audio or video file has processed, hover your mouse over the video and select ‘Edit’ (or just edit an existing video)

7. Next, select ‘Captions’ from the left-hand side of the screen (select the arrow to change the language to ‘United Kingdom from United States)

8. Next, click where it says ‘Import captions’ and select ‘Import automatic captions’

9. The captions file will then appear in the editor (note you can edit any caption if there are any errors by clicking on the text)

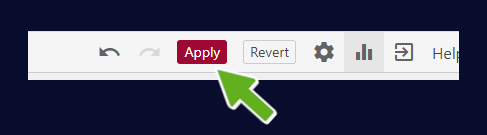
10. When you are satisfied with the captions text and accuracy, click on the red ‘Apply’ button and then wait for a box to appear, then select the blue ‘OK’ button.
(note: you can embed the Panopto video into Canvas with captions by going to ‘Share’ and selecting ‘Embed’)
Getting a text transcription
1. Next ‘stop’ the automatic playback and exit the video editor
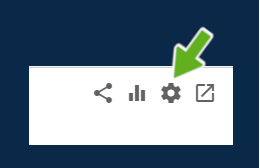
2. Hover your mouse over the video and this time select ‘Settings’
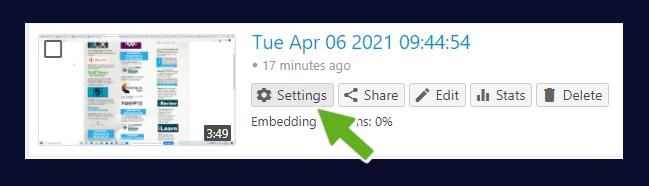
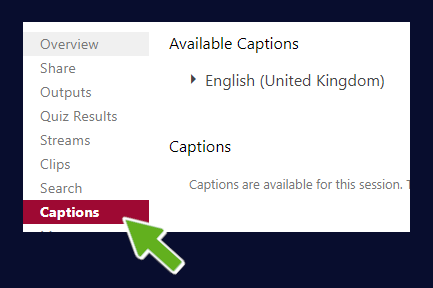
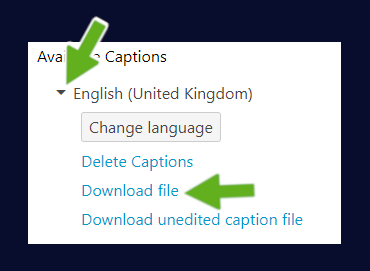
3. Click on ‘Captions’ > Then from the ‘Available captions’ area, click the arrow to expand the options and select ‘Download file’
4. Depending on your browser, the file will download at the bottom toolbar (you can always navigate to your ‘downloads’ folder on your computer
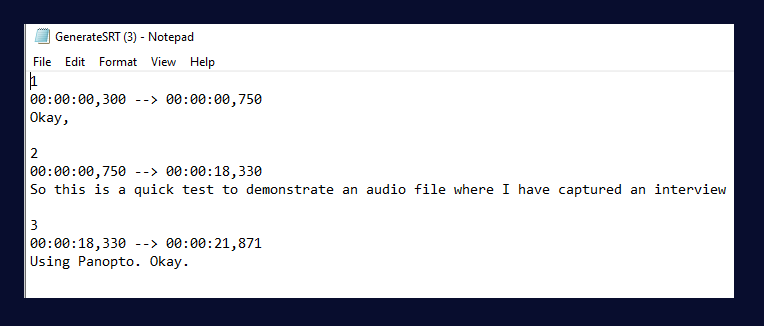
5. Open the file and save it to a usable location (The file will most likely open in a notepad, like the below example shown)
Watch a tutorial video to learn more
Other alternatives
You may also wish to check out Otter.ai – this is a easy to use speech to text translator. A free account will provide for 600 free minutes per month, but only x3 video/audio uploads.
More information on Otter.ai is available from the following link.
How to download the Panopto desktop app
Panopto will enable you to edit any captured session, this resource will show you the basics of trimming sections in your recording.
1. Login to Canvas and visit your Marjon Canvas course
2. Click on ‘Panopto Video’
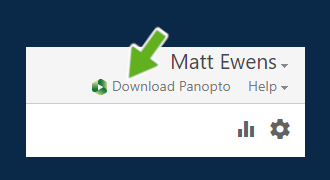
3. Click on the settings icon in the top right-hand side of the screen.
4. Click on the ‘Download Panopto’ link (note you may need to login again)
5. Follow the on-screen prompts to install the program on your machine. (note if you are installing on a Marjon laptop you will need to get it unfrozen by Computing Services)
How to share Marjon Canvas course Panopto recordings (externally)
This resource will explain how you can share Panopto captures externally and detail how the system is configured.
All Majon Canvas captures (either synchronous or asynchronous) should be setup using the desktop Panopto recorder and the appropriate module folder selected:

The permissions are setup for module captures to allow only those enrolled on the module access to them.
If you need to make module captures available externally for any reason, then you should follow the below guidance. (Note, within Panopto you have a ‘My Folder’ space. This is your personal space and any recordings you upload to this space can be shared however you like and are unrestricted.)
To share Marjon Canvas course recordings externally
To be able to share Marjon Canvas course captures externally, you’ll need to make a copy of the capture to your ‘My Folder’ space in Panopto.
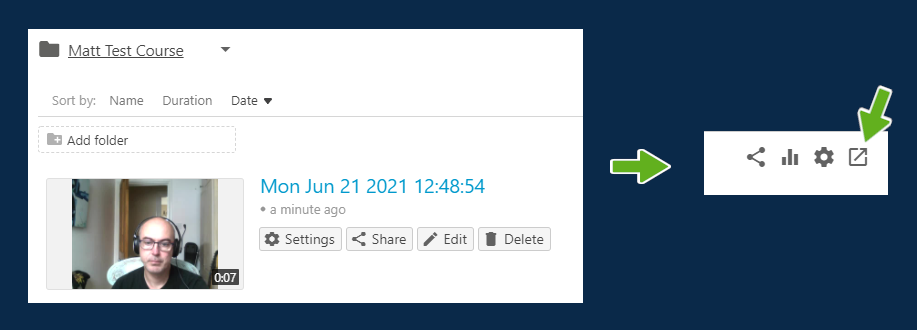
1. Visit the Marjon Canvas Course page then click on ‘Panopto Video’ > Click on ‘Open in Panopto’ icon (right-hand side)
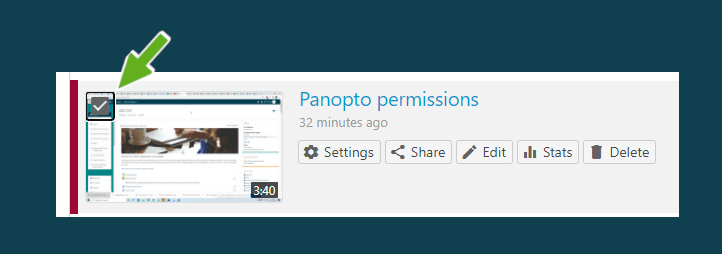
3. Hover your mouse over the module video that you want to make available externally and check the box.
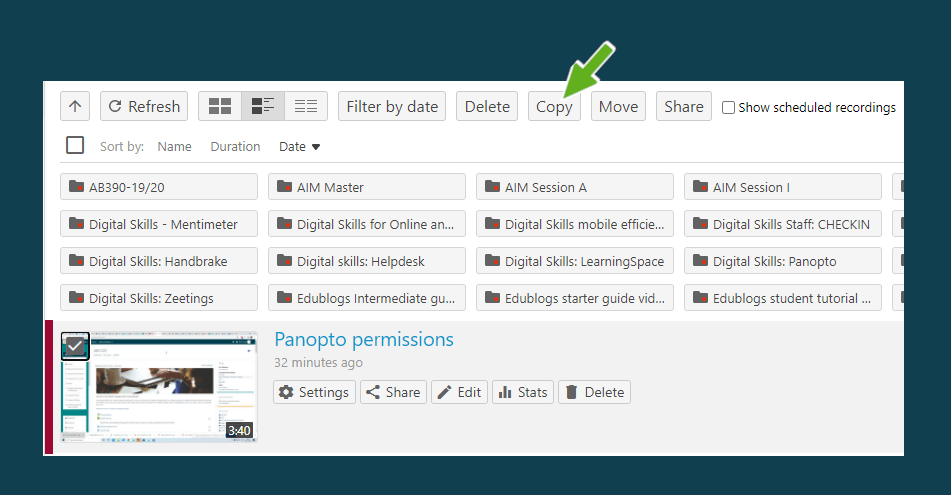
4. Next click on the ‘Copy’ button above
5. A pop-up box will appear > Click on the drop-down (copy a folder or start typing to search) > Select ‘My Folder’
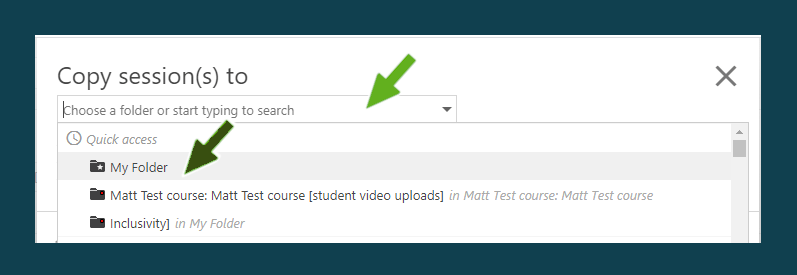
6. Click on the ‘Copy button’
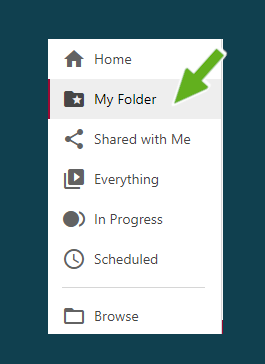
7. Navigate to your ‘My Folder’ in Panopto by using the left-hand menu
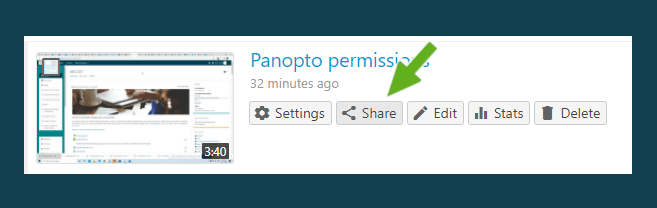
8. Find the copied module capture and hover your mouse over it > Select ‘Share’
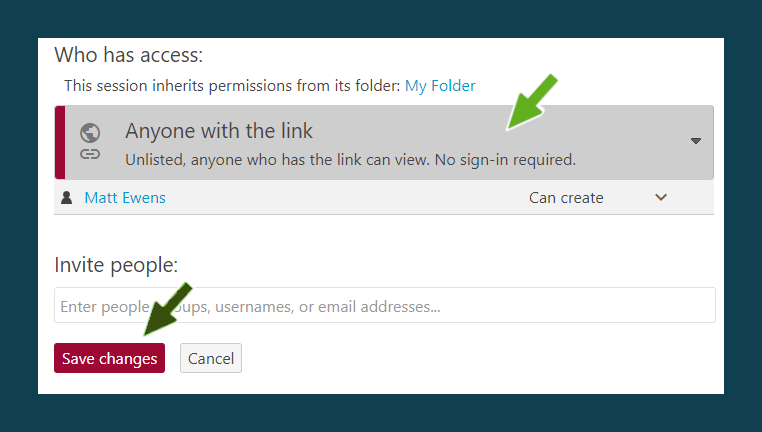
9. Click where it says ‘Specific people’ > Then select an appropriate option (we’d recommend ‘Anyone with the link, unlisted’ for external viewing)
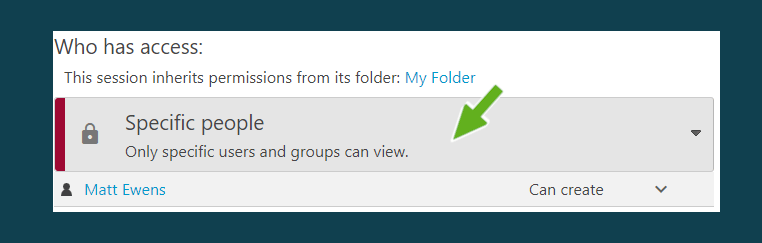
10. Save changes
Tip: You can also use Panopto and your ‘My Folder’ space to upload any videos you have and make them available as well as Teams recordings. (View the Academic Sharepoint site essential skills space for more details)
Sharing your ‘My Folder’ videos to specific people
To share your ‘My Folder’ videos only with specific people, follow the below instructions:
1. From your ‘My Folder’ space, select ‘Share’ from a video you want to share to a specific person or multiple people.
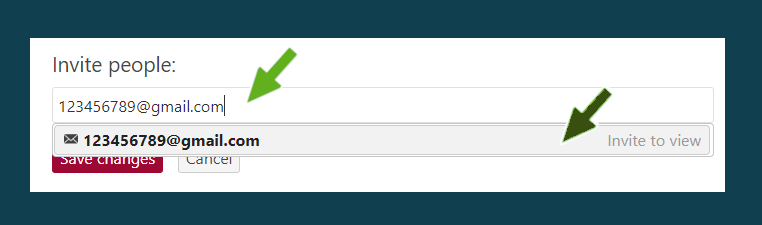
2. Enter the email address in the ‘Invite People’ box > Then click on the emboldened email address
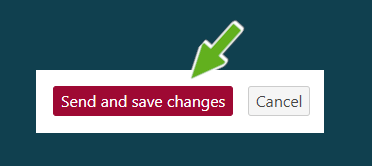
3. This should open up a message box > Enter a message if you wish and then click on ‘Send and save changes’
How to setup a live Panopto webcast in Canvas
What is a live Panopto webcast?
A live webcast enables your students to watch the live lecture capture remotely using a URL link. (this is only useful if your students are unable to attend the lecture in person, you can also use Teams for live capture)
1. Login to Canvas and visit your Marjon Canvas course
2. Click on ‘Panopto Video’
3. Click on ”Create’ > ‘Panopto for Windows’
4. Click on the ‘Open Panopto’ (note: if you don’t have the Panopto Desktop recorder installed on your machine, you will need to contact a member of the Computing Services Team)
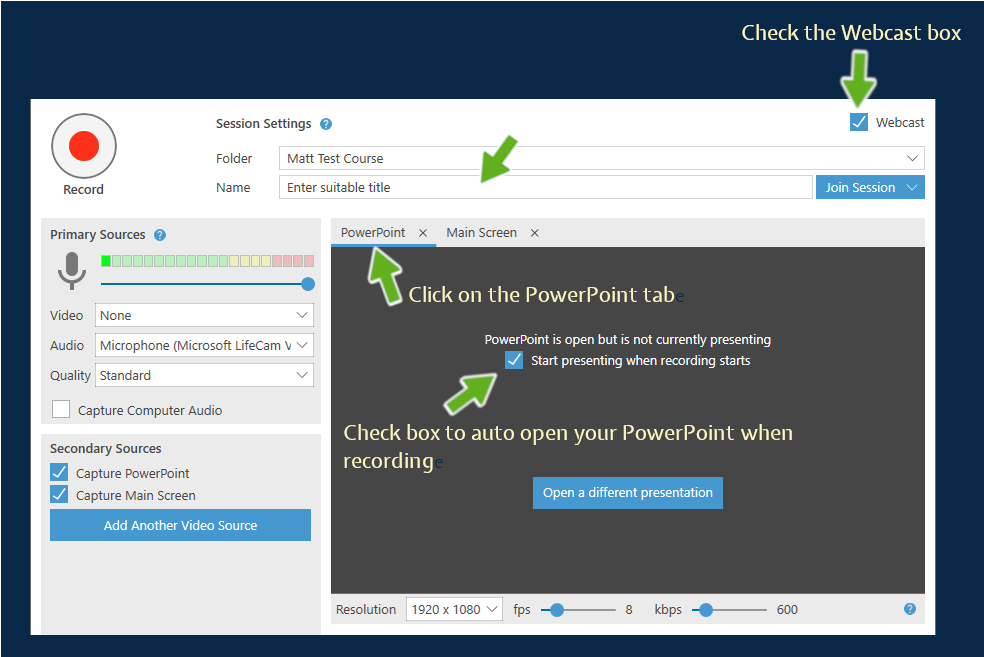
5. Open your PowerPoint presentation, then ensure the settings are as below (note, click on the tab to show ‘PowerPoint’) > make sure the ‘Webcast’ box is enabled
6. When you are ready to begin the webcast click on the record button
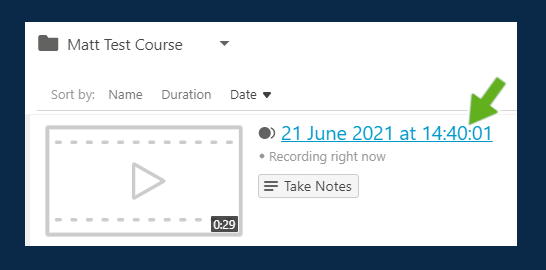
7. Ask your students to log into into their Marjon Canvas course > ‘Panopto Video’ space and to click on the link to start watching the live webcast (note there can be up to a 5-10 second delay for remote viewers)
9. When you have completed your presentation live webcast, simply press the ‘F10’ button on your keyboard or navigate back to the desktop recorder and press the stop button.
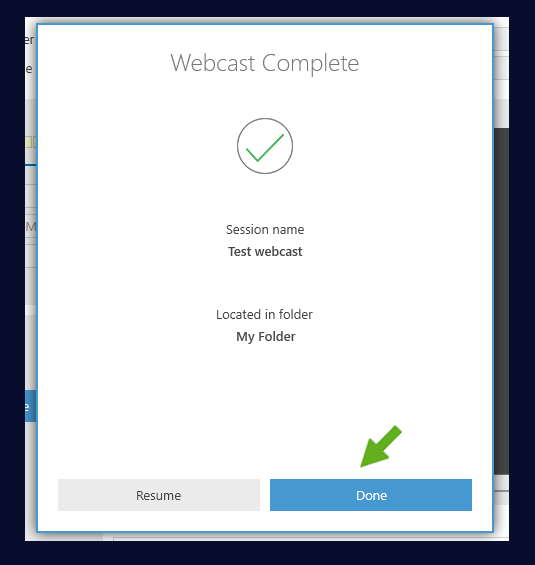
10. Click ‘Done’ on the success message.
11. Once the webcast has processed it should become available in the Marjon Canvas course page
Resources
Watch a tutorial video to learn how
How to include your laser pointer in recordings
If you want to include the laser pointer in your recordings using Panopto (or via Teams) – you should ensure that you share your desktop (Capture Main Screen) and not just your PowerPoint presentation. (Capture PowerPoint)
Note: to enable the laser pointer in PowerPoint, start your presentation, right click on your mouse and select ‘Pointer options > Laser pointer’
In the Panopto desktop recorder, ensure that the ‘capture main screen’ is checked – this will capture whatever you visit or view from your computer. It will also capture mouse movements and laser pointer movements.
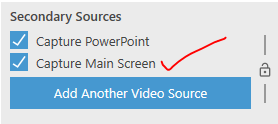
Note: if you select both ‘Capture PowerPoint & Capture Main Screen’ students will be able to select either source when playing back the video. You may wish to just provide them with the ‘Capture Main Screen’ option.
Student playback
When students visit the recording on Panopto, if both Secondary Sources have been selected they will have the below options. (they should select ‘Screen’ to view mouse movements and laser pointer movement)
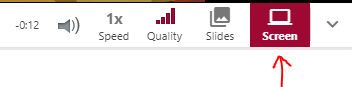
If you have only captured the main screen then ‘Slides & Screen’ will not appear – students will just see the output from Capture Main Screen. (probably preferable in these circumstances)
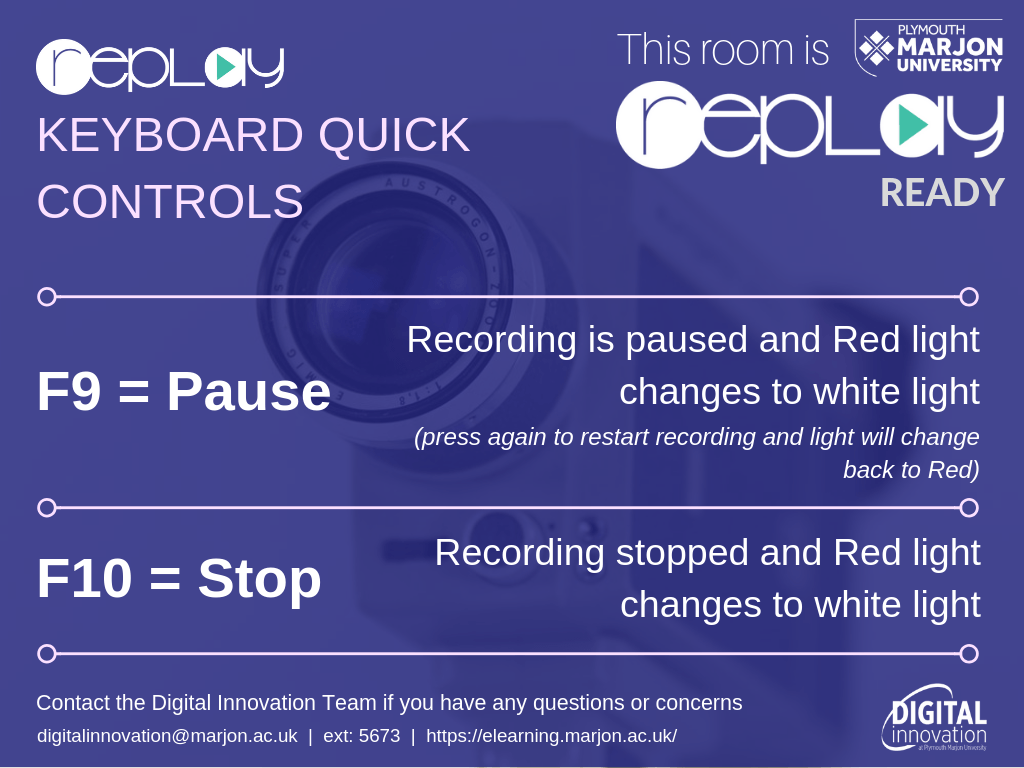
Panopto: Keyboard quick controls
During a session staff members have the ability to control the recording using the In Session controls.
F9 on your keyboard will PAUSE a recording, the light will show WHITE. F9 will also RESTART a recording if it has been paused, the light will go back to RED.
F10 will STOP the current recording, the light will go WHITE.
How to view Panopto stats
1. Login to Canvas and visit your Marjon Canvas course
2. Click on ‘Panopto Video’
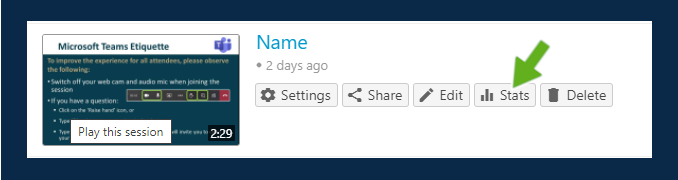
3. Hover your mouse over the recording you want to view stats on and click on ‘Stats’
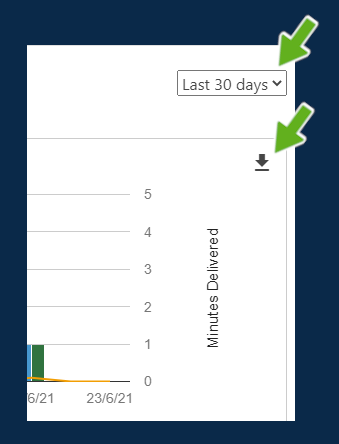
4. Filter your stats using the right-hand drop-down menu or select the downward facing arrow to download
How to embed quizzes & more into your Panopto recording
Did you know that you can embed quizzing directly into your Panopto recording? Or a website or YouTube video?
Read on to learn how!
Embedding quizzes
1. Login to Canvas and visit your Marjon Canvas course
2. Click on ‘Panopto Video’
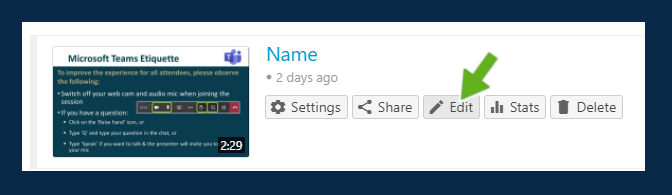
3. Hover your mouse over the recording you want to view stats on and click on ‘Edit’
4. The video will load in the Panopto editor > Next click on the timeline where you want the embedded quiz
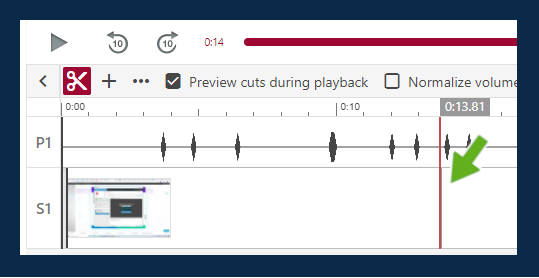
5. Now click on the ‘Add a quiz’ button on the left-hand side

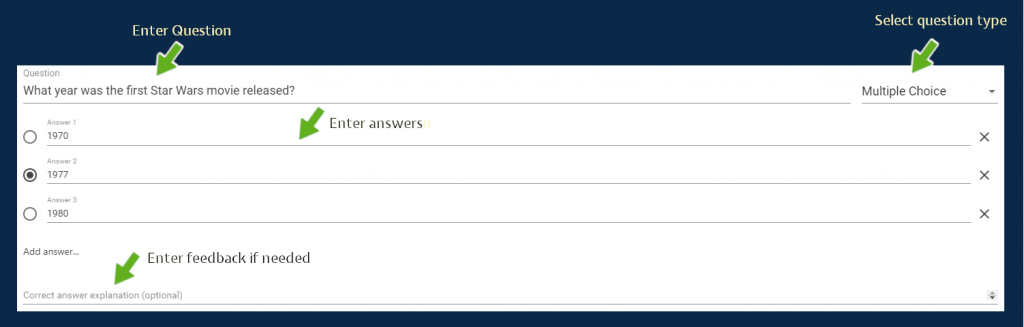
6. Next enter the question, then answers if multiple-choice, or use the right-hand menu to select a different question type
7. If you wish you can opt to add more questions or if you only want to ask one question click on the
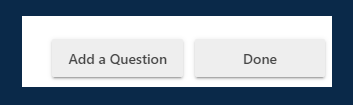
Note: if you opt to add more questions, then you will have the opportunity to re-arrange them if you wish.
8. Next select the features you want, for example you may wish to switch off the ability for the students to see the answer
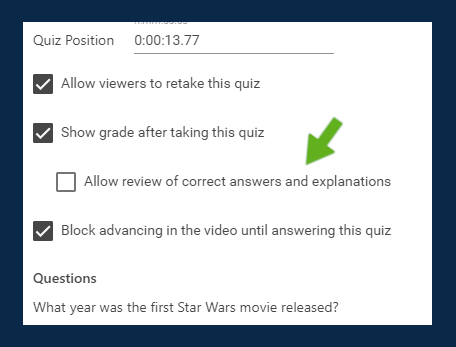
9. When you are happy, click on the ‘Finish’ button to add the quiz
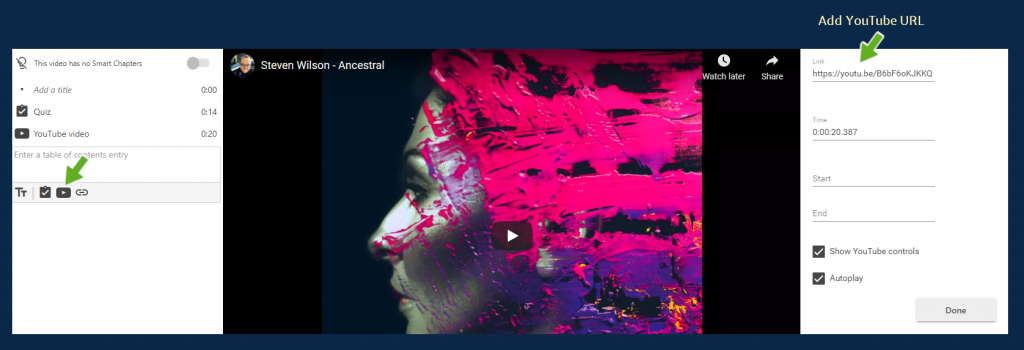
Adding a YouTube video
To add a YouTube video at any point in your Panopto recording click on the video icon on the left-hand side of the editor as below:
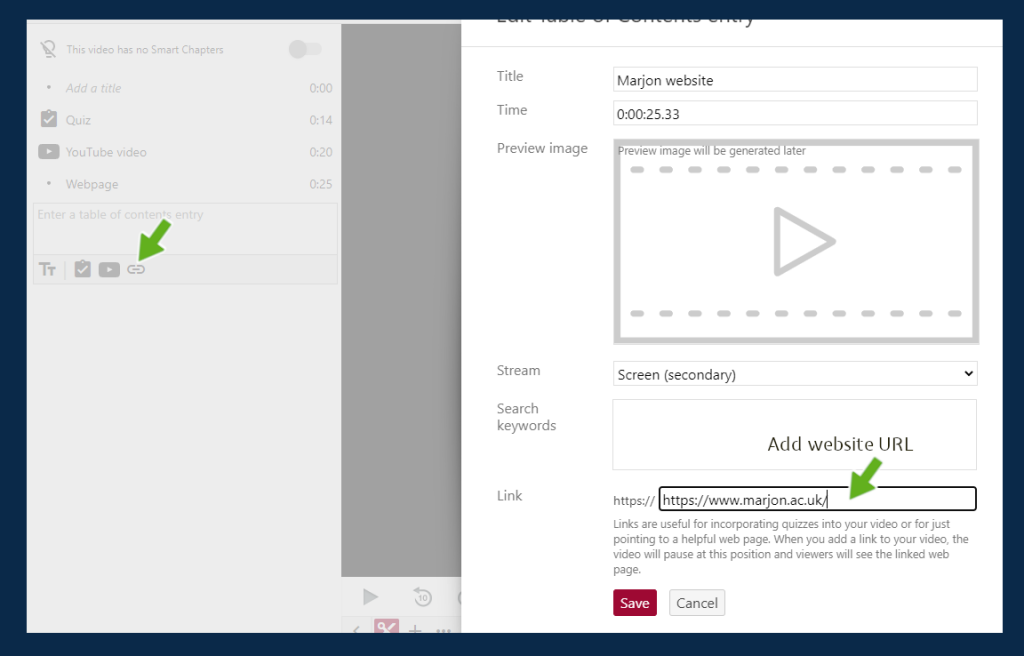
Adding a website
To embed a website into the Panopto recording, simply select the link icon on the left-hand side and enter the URL and save. Students will be able to navigate around the site within the video and they can continue watching the Panopto recording when they are finished with the website by hitting the play button.
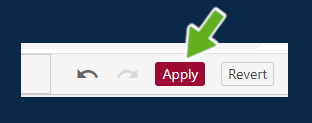
10. When you are happy with the elements that you have added to your recording make sure you press the ‘Apply’ button to save the changes and publish them
Resources
Watch a tutorial video to learn how
