Digital pedagogy is about how tools can be applied to teaching and learning and not just about using them. For example what is the approach used when using the tool from a critical pedagogical perspective. How do you use a digital tool productively to enhance the teaching and learning experience. How can the tool improve retention, or be used for engagement? The methodology behind the use of the tool and also application. There are a number of different types of pedagogy and popular examples are ‘blended learning’ and ‘the flipped classroom’.
The hybrid model of teaching and learning, is an example of a type of pedagogical approach which is currently in practice at Plymouth Marjon University. This model of teaching and learning provides opportunities for located (on-campus) teaching and learning as well as remote or home-based teaching and learning.
The below examples utilise different tools that can be applied primarily for online teaching and learning, but most of these could also be applied within a located classroom experience.
You may also like to review the downloadable guides for different types of pedagogical practice.
Digital pedagogy in practice
Explore examples of different digital tools used in support of pedagogical practices, by opening the below tabs.
Interactive quizzing in Teams with Quizlet
If you want to add more interactivity in the form of quizzing or a fun educational game as an activity with students in a live online Teams session, then Quizlet could be worth looking at.
Quizlet enables you to setup flashcards, tests and quickfire live educational games for your students. You can also embed different activities into your modules. This guide will cover how to setup your Quizlet space and use the live educational game option in Teams. (note the study tools are not covered in this tutorial, but there are tutorials online, such as the one from this link)
Setup
In order to setup your Quizlet, you may want to firstly create a class – this will enable you to share your Quizlets privately.
1. Go to https://quizlet.com and select the ‘Sign up’ button (go through the setup process)
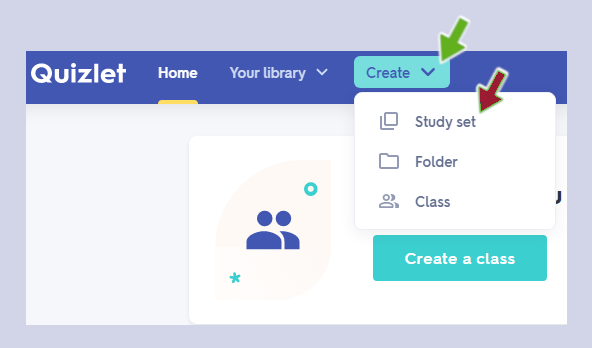
2. Once you have logged in click on ‘Create’ then select ‘Study Set’ (close down the promotional box advertising the teacher account)
3. Enter a title for your study set and a description if needed
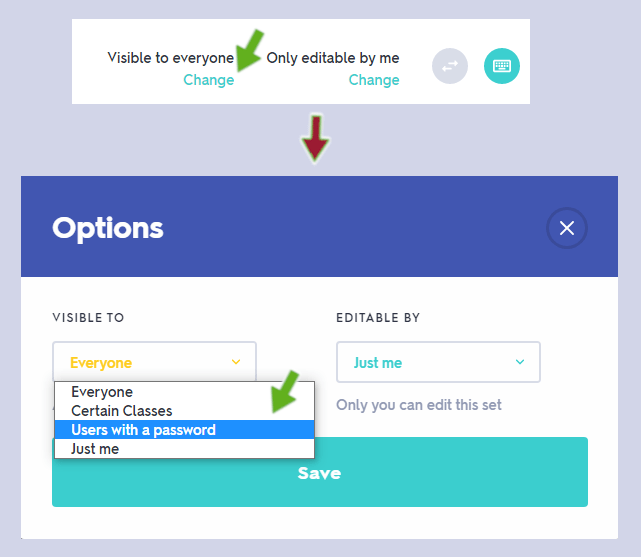
4. Next set the visibility of the set (you may wish this to only be visible to your students with a password for example)
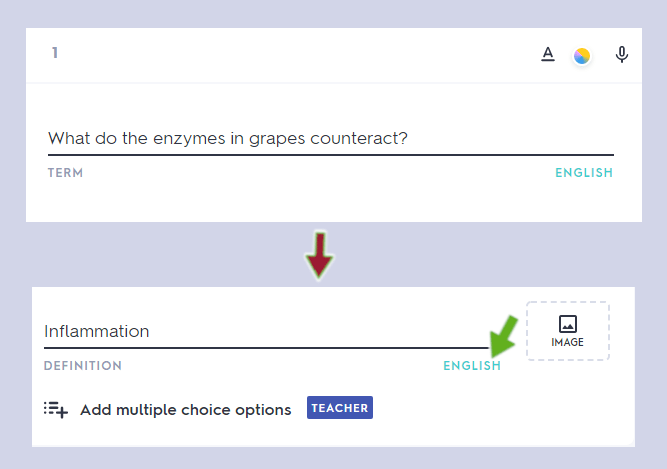
5. Next you need to start entering ‘terms’ and ‘definitions’ – if you think about this as a quiz, ‘terms’ = question – ‘definitions’ = answer
6. Complete all the empty cards and then add one more by selecting ‘+ ADD CARD’ (we need x6 cards in total to be able to facilitate a live educational game) – (You can add images if you wish & before the quiz starts students will be able to flip the flash cards to reveal the answer to ‘rehearse’ before the start. If you don’t want to allow students to rehearse, activate the quiz as soon as all the students have joined)
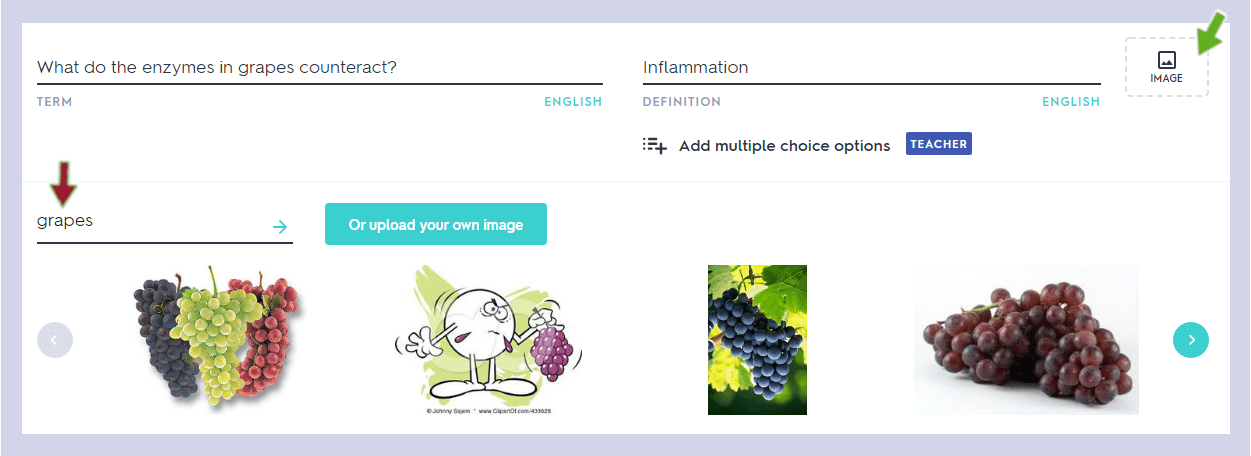
Image tip:
If you do select the image selector, if your question is quite specific it is unlikely to pull up any image options – therefore erased the question in the search box and instead type in a more generic term – for example ‘grapes’
7. Once you have created all your x6 cards, click on the ‘Create’ button
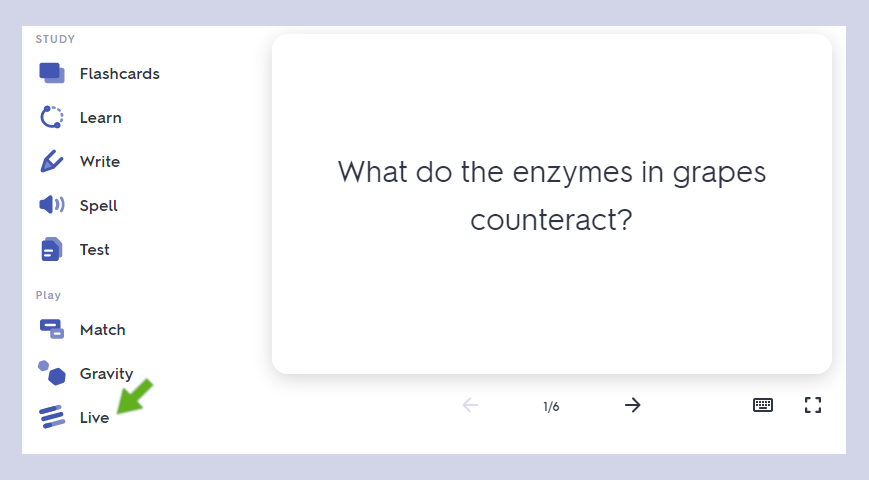
8. You will be taken to the main study area, which is divided into x2 sections ‘study’ and ‘play’ – for this guide we will be using the ‘Live’ educational game option. (more on the study options later)
9. Click on ‘Live’
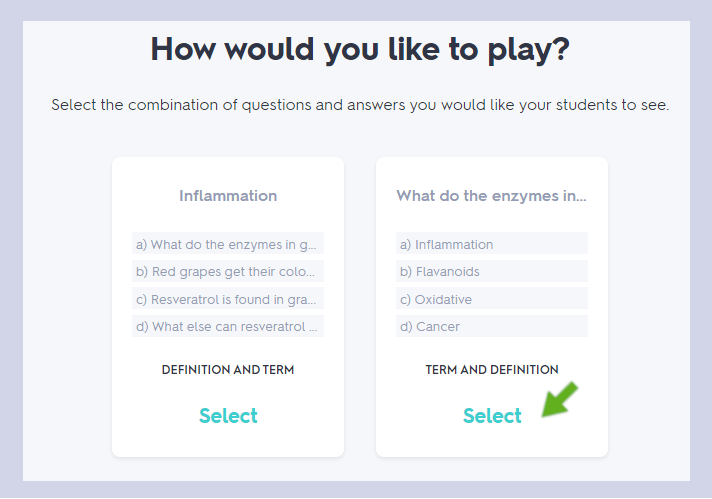
10. Select if you want your students to be placed into teams or if you want students to play the game individually (note for teams you need 4 or more students)
11. Now select the second option – ‘Term and Definition’
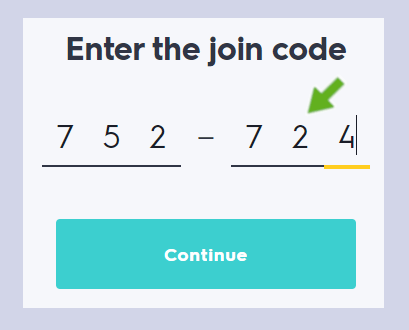
12. Copy the quizlet live website address and code, then paste into the Teams chat space and ask your students to join the quiz – wait until you see that all students have joined up (ask them to enter their name, not a made up name) (note you may wish to switch off the happy music via ‘Options’ at the top right of the screen)
13. Your students will need to enter the correct code to join as below
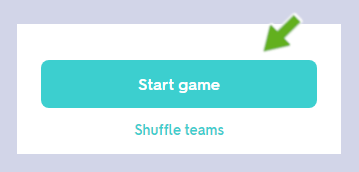
14. When all students have joined click on ‘Create game’
15. When you select ‘Create game’ students will be waiting to start and you’ll need to then click on ‘Start game’
Tip: If you want to you could share your screen to display the ‘live’ quiz and if you’re recording the session it could make for a fun ‘recap’ for students watching the recording back
Tip: ‘Continue with stats’ shows what students learned and where they may have struggled
Tip: To make the live game a bit trickier, consider adding more cards than the minimum of six.
Resources
Watch a tutorial video to learn more
Using Microsoft Whiteboard
If you are in need of adding some interactivity to your sessions in Teams, have you considered using Microsoft Whiteboard?
Microsoft Whiteboard will enable you to either display a board that you can write, add text or shapes into. You can also setup the whiteboard so that your students can collaborate on. Perhaps you want to use the space during a collaborate brainstorming session?
If you are recording the session, this will capture the live interactions, but you can also export the whiteboard as an image.
To use Microsoft Whiteboard during a Teams session, please follow the instructions below:
1. Open your Teams meeting
2. When you want to use Microsoft Whiteboard, stop sharing your PowerPoint presentation or other source if you are sharing
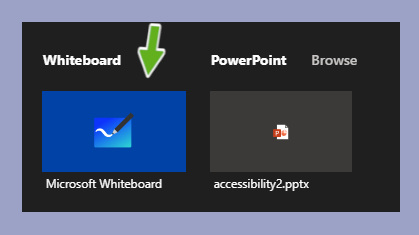
3. Click on ‘Share Content’
4. Select ‘Microsoft Whiteboard’ (it should be located on the right-hand side)
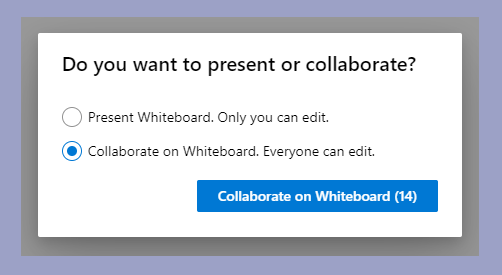
5. Once activated select whether you want only you to use it, or whether you want your students to be able to collaborate on the board
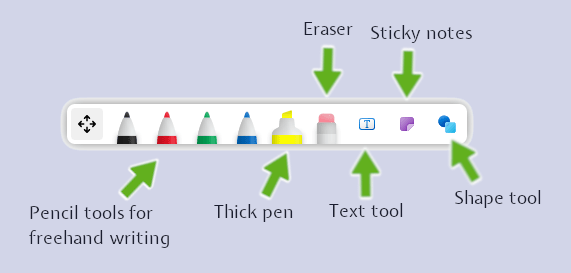
6. Take a look at the below key, which shows how the functions work.
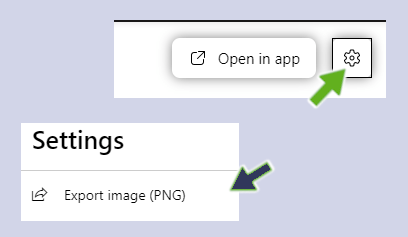
To download your whiteboard as an image, head to the settings menu:
Watch a video tutorial to learn more
Resources
Watch a tutorial video to learn more
Breakout Rooms
Breakout rooms is now available for academic staff to use for online meetings and this guide will show how to create a breakout room or rooms.
Access a Word guide for Teams here. (or view the online guidance from Microsoft here)
Creating breakout rooms
1. Open Microsoft Teams
2. Go to your Marjon Canvas course Team and activate your meeting (you can only setup breakout rooms within a live meeting)
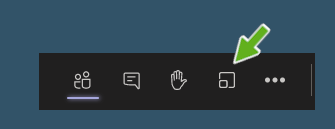
3. Click on the breakout room icon (next to the raise hand icon)
4. Select the number of rooms you need for your breakouts (you may want to assign different students to different breakout room groups for example)
5. Select how you would like to assign your students, if it’s automatic they will be assigned to the rooms and they will automatically open when you open them
6. If you wish to manually assign students, you will need to add them yourself
7. When you are ready, select ‘Create rooms’
How to manually add students to your rooms
1. To manually add students your students will need to be joined to the meeting
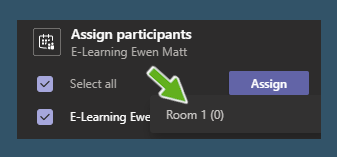
2. Select the ‘Assign participants’ drop-down menu

3. Check the boxes next to the students you want to assign to a particular breakout room > then click on ‘Assign’
4. A drop-down list of your rooms will appear, click on the room that you want to add the student(s) to
5. Your student(s) will now be assigned to the room(s) – to check this, click on the arrow for the room to expand it
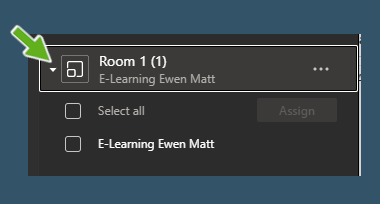
(You can re-assign students to other rooms at this point if you need to by checking the box next to their name and selecting the ‘Assign’ button)
How to activate your breakout room(s)
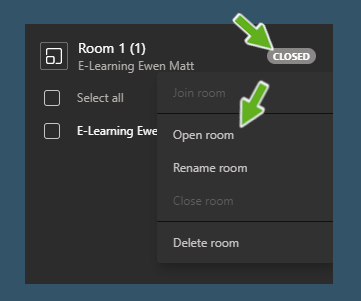
1. To ‘open’ or activate your breakout rooms hover your mouse over the ‘closed’ area and click on the 3 dots icon
2. Select ‘Open room’ from the available options
3. The students in those breakout rooms that have been opened will then leave the main meeting and their breakout room will open – they will be able to share content, have conversations and can record
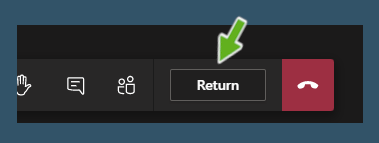
4. When your students are ready to re-join the main meeting, they should select the ‘Return’ button in their breakout room
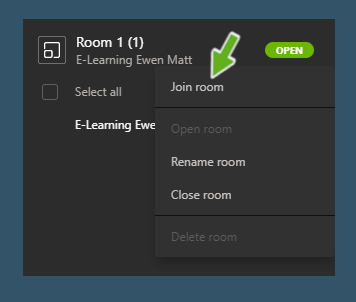
5. As owner you will also be able to join any breakout room if you need to. To do this click on more options for the room and select ‘Join room’ (note this will put the main meeting ‘on hold’)
Make an announcement
If you need to let students know that they need to come back to the main meeting or for any other reason, you can make an announcement which will display in all breakout rooms.
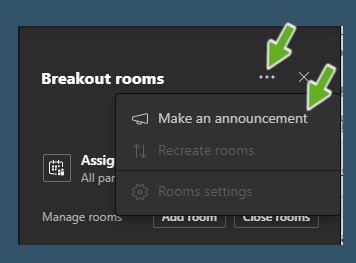
1. Click on the more options (3 dots) adjacent to the ‘Breakout Rooms’ heading at the top > Then select ‘Make an announcement’
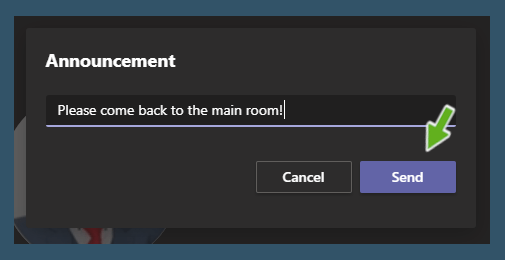
2. Enter your announcement message and select ‘Send’
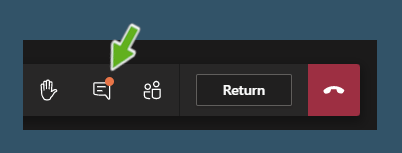
3. Your students will receive a notification in the messaging area for their breakout room
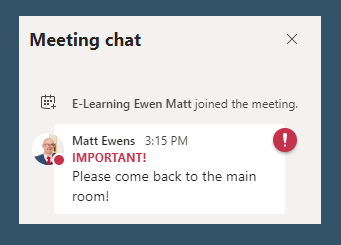
4. When your students click on the messaging area – they will see the announcement message
Resources
Watch a tutorial video to learn more
Creating a breakout room
Creating multiple breakout rooms and manual assignment
Using your phone to capture interviews with Evernote
Note: This guide is for face-to-face meetings, which should be undertaken safely outside and comply with COVID restrictions (2 meter distancing)
Evernote is a great tool, which enables you to capture notes and also audio interviews for free!
This guide will take you through the process of how you can capture audio interviews using your phone and how to edit them using Audacity.
1. The first step is to download the Evernote app onto your mobile device (visit the Android play store or itunes store on your phone)
2. Open the Evernote app on your phone and either create a new account using your Google account or enter your email address and follow the prompts to setup your new account
3. On the next screen you should opt to close the window, as displayed in the below screenshot
4. You should now be taken to the home screen, (note you may need to scroll through a help walkthrough first.) where you should click on the green + icon
5. Next, select the ‘Audio’ option – this will open a new Evernote and the recording will automatically begin. When you have finished the interview, just tap the top left-hand side of the screen to stop the recording. (Enter a title for the recording if you wish)

Watch a video tutorial to learn more
Padlet: How to create interactivity using Padlet in sessions
In this resource, we are going to look at ways you can effectively use technology – specifically smartphones to inject interactivity into your sessions.
What is Padlet, what are you talking about?
Padlet is an online browser-based tool that enables teachers to create interactive boards online, whether these are documents or just web spaces where students can all directly engage and share their content. The spaces can be private spaces, just for you and your students and some of the benefits include being able to embed spaces straight into LearningSpace and also the ability to share Padlets by using the Marjon QR code reader.
Padlet uses
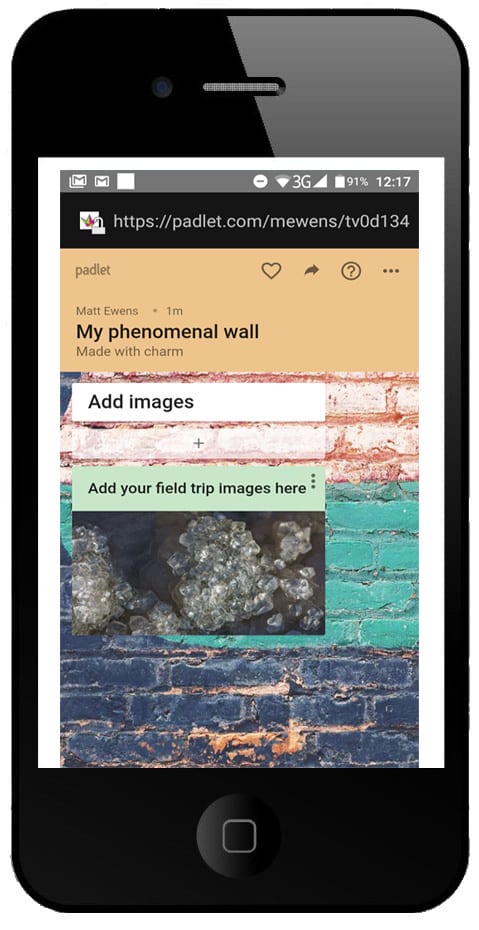
If you want students to collaborate in a live session, for example share images taken on their smartphones related to a field trip exercise – they can do this using your Padlet board. All they’d need to do is zap the Padlet QR code, using the Marjon QR code reader and then find the media they want to share and this will automatically appear within the Padlet board on-screen. This could be a great way of interacting with students and all that would be required is the setup of the Padlet board and access via a browser. Students don’t even need the Padlet app on their smartphone to be able to engage with it.
How do I make this happen?
It’s very easy to setup Padlet, follow the below steps:
1. Visit https://padlet.com
2. Create a new free account
3. Select + Make a Padlet

4. Select a template or from the list of options, or start with a blank (The shelf format is used in this example)
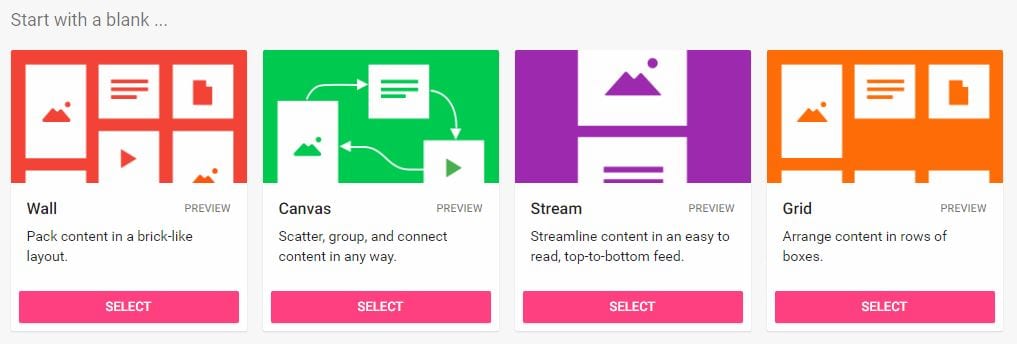
5. Select from a range of wallpaper types, themes and styles
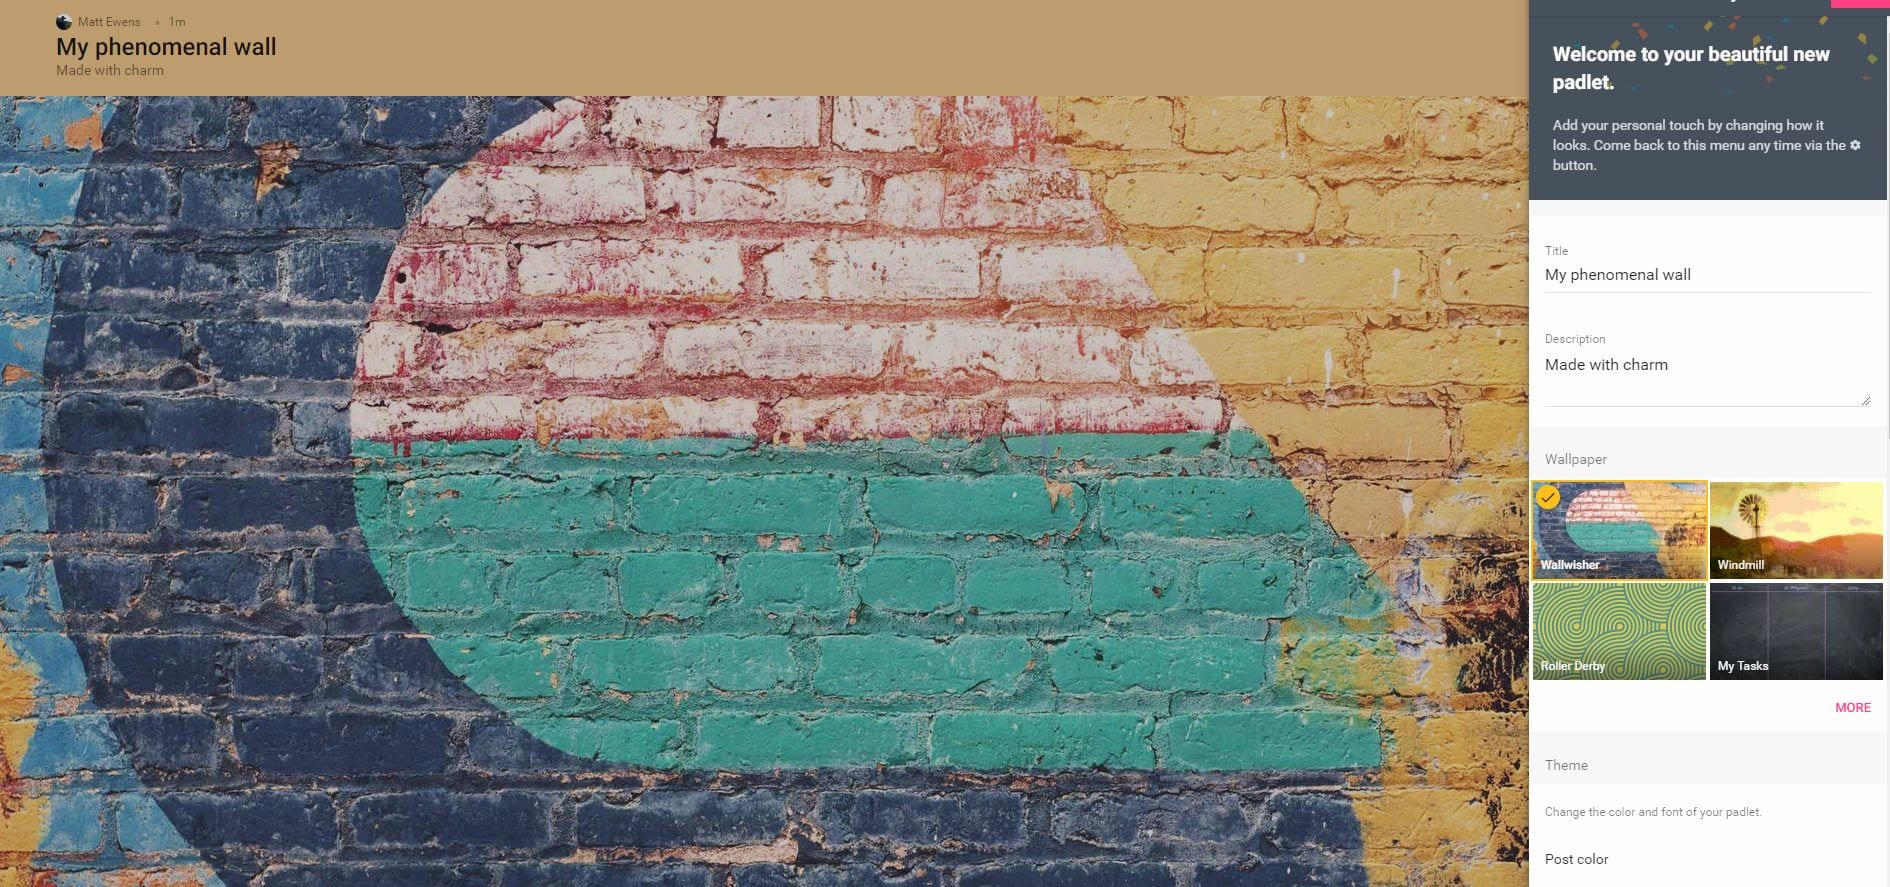
6. Next select the privacy options, for example add a password to protect the wall and then start the Padlet.
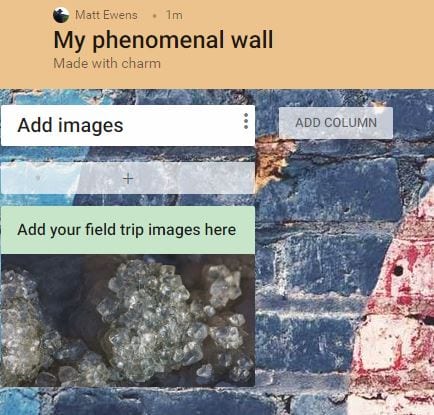
7. To add a section, just double click on the board and enter a title and in the below example we’ve added an image to start things off.
When you’ve setup the board how you want it to be, you can then share it with you students. To do this go to ‘Share’ at the top right-hand side of the screen and select the ‘Share/Export/Embed’ tab. You’ll notice a QR code has appeared. Ask the students to open the QR code reader in the Marjon app and then zap the QR code on screen.
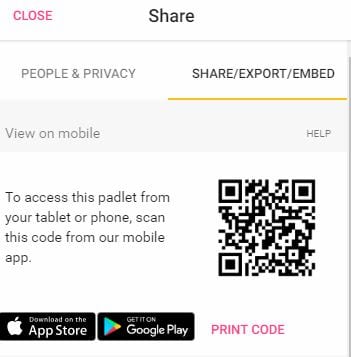
tip: if you click on ‘PRINT CODE’ this will display the QR nice and big on-screen.
Remember to setup your desired privacy options in the previous tab, before opening up the sharing options to students
When students scan the code they’ll be able to add their media to the Padlet and this will automatically appear on screen during the session. The beauty of this tool is that the students do not need a login or account to access and it works seamlessly by using the Marjon mobile QR code reader.
Embed a Padlet into LS
If you wish to embed the Padlet board into LearningSpace, follow the below instructions:
1. In Padlet click on ‘Share’ in the top right-hand side of the page then ‘Share/Export/Embed’
2. Click on ‘Embed in your blog or website’ and copy the embed code
3. Login to LearningSpace and navigate to the module where you want to embed the Padlet
4. Turn Editing on and then setup a new label.
5. In the label text box toolbar, select the toolbar toggle to open more options
![]()
6. Click on the code icon to open the coding box
![]()
7. Paste the copied embed code into the box and select ‘update’ – then Save and return to course and turn editing off.
The only potential drawback of using a free account is that you are limited to 3 boards or Padlets, so if you need to keep them you can only have 3. You can get around this by exporting a Padlet as an image, PDF or CSV file – or simply wipe the content when it’s no longer used and rename the sections.
Watch a case study video featuring how Sarah Martin has used Padlet effectively
Read more about the case study, featuring Sarah Martin.
If you’d like any help setting up your Padlet space or are interested in a demonstration, please contact the Digital Inn
Using Mentimeter in the classroom
Using technology in the classroom may seem daunting and also challenging, particularly using digital tools that may be unfamiliar and especially within a live teaching session. So, how do you start, what tools are available and how can you use them?
This post is the second case study in the series focussing on the use of digital tools in the classroom.
Summary
Miles Smith, Lecturer saw the potential of Mentimeter whilst attending a conference and was impressed with the audience enthusiasm and feedback on the use of the tool. Following on from this, he decided to use the tool, including Padlet with his students to aid reflection, discussion and as a method to test the students’ knowledge during the session. Students have enjoyed the use of the tools to aid collaboration and as a resource that’s available as a reflective document after the session.
What is Mentimeter?
Mentimeter is an easy to use online platform for voting and collaborating, primarily used to support engaging presentations. It’s also used in an educational setting and can easily be introduced during a session to quiz students via a range of different question methods. These include a word cloud, multiple choice, scales, matrix, open-ended and many more question types.
Watch the below film to find out more. (this video will have captions enabled in due course)
Activities
During the session, Miles started by engaging the students in discussion around a topic to get the students thinking. He then used the open-ended question type in Mentimeter to open up a dialogue around the topic area that had been discussed. Students then used the simple code to open their browser and access the question to answer the question, including using their smartphones. Students then posted their views on the question related to the topic discussion. Miles then opened up the session for further discussion around the responses made in groups.
Later on in the session Mentimeter was used to quiz the students about a certain factor that they felt was most influencing relating to the main question posted. This used a different question type with set answers that the students could choose from.

Challenges
Miles couldn’t see many challenges in terms of using the software, it’s ease of use is a very positive factor in terms of setting up presentations and quizzes that can be used during a session.
One of the potential challenges or restrictions of a free Mentimeter account is that you are restricted to using just two slides in any given presentation. Miles didn’t feel that this was a hindrance as it did mean that the tool could only be used sparingly as there could be a temptation to overuse its use in the classroom.
In terms of Padlet, Miles is still developing his use of the tool. Some aspects felt a little clunky, which made it slightly challenging for the students in terms of posting content, which could be posted off-screen or needed to be moved into a better position in the Padlet. You can select different types of template, which have different settings for example a single thread down the page, or templates that work in blocks, so this may alleviate some of these challenges.
Benefits & Outcomes
In terms of the session, the use of Mentimeter and Padlet aided communication and provided students with a more engaging and interesting experience. Feedback on using the tool was instant and Miles was able to very quickly gauge his students’ understanding on a specific topic.
The students all seemed to enjoy the session and they could access Mentimeter from their browser through their laptop computer or their smart device easily.
None of the students had any difficultly accessing the tools and they were all actively involved in shaping the session in a positive way.
I think they liked to see their posts going up anonymously and then for those to be used and engaged with the tutor, Miles Smith
An important consideration is how the tools are used with the students, so if Padlet is used what is the nature of the task? How do you setup purposeful, collaborative tasks that are meaningful to ensure that they are communicative and not something that is about the students working independently and doing it themselves?
The session therefore was complimented by having that group interaction, with groups of two students collaborating on different topics and questions. The technology and use of Mentimeter helped to reinforce learning and the Padlet board is also available to the students as a downloadable PDF in their LearningSpace. This means that they can go back and review content.
It was interesting because it got them to really deliberate and consider different options to develop those critical thinking skills
More details
Head over to Mentimeter and setup a free account to get started: https://www.mentimeter.com
You can also find further digital tools available to try from our Socrative is an online quizzing, formative assessment and student feedback tool. Students can use their own devices to access and engage with the activities.
The Digital Innovation team got together with Vicki Evans from Sports Therapy to discuss how she has used Socrative in her teaching.
For guidance and information on the use of Socrative please visit our guides on the Digital Skills support area
Creating a Socrative account and setting up your room
Socrative is a web based question and feedback tool which can be with students within a lecture or session. Students can access the system from their own devices to answer pre-planned questions or to provide instant feedback. You can have up to 50 students participating in an activity at one time. Socrative can be used from a computer browser or using the specific apps for students and teachers.
Creating an Account
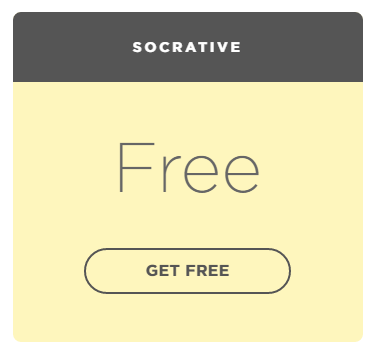
You can quickly and easily set up a free teacher account by going to www.socrative.com. Follow the ‘Get Account’ link and select the ‘Get Free’ option.
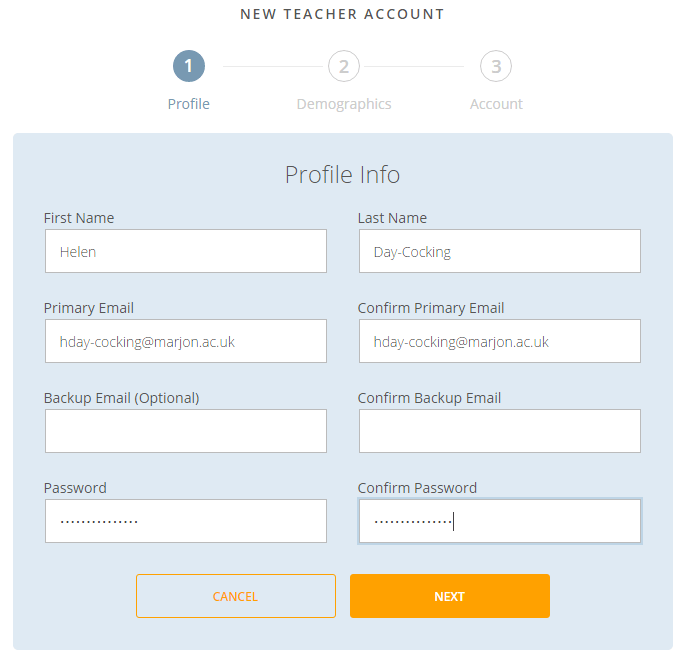
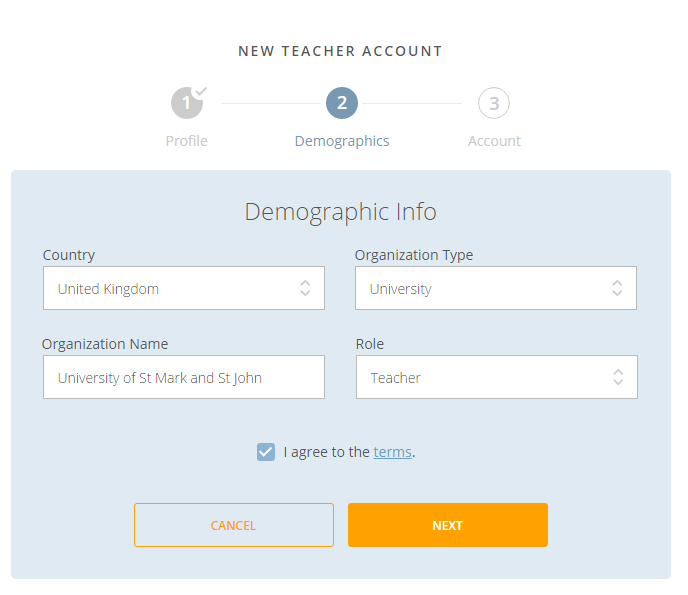
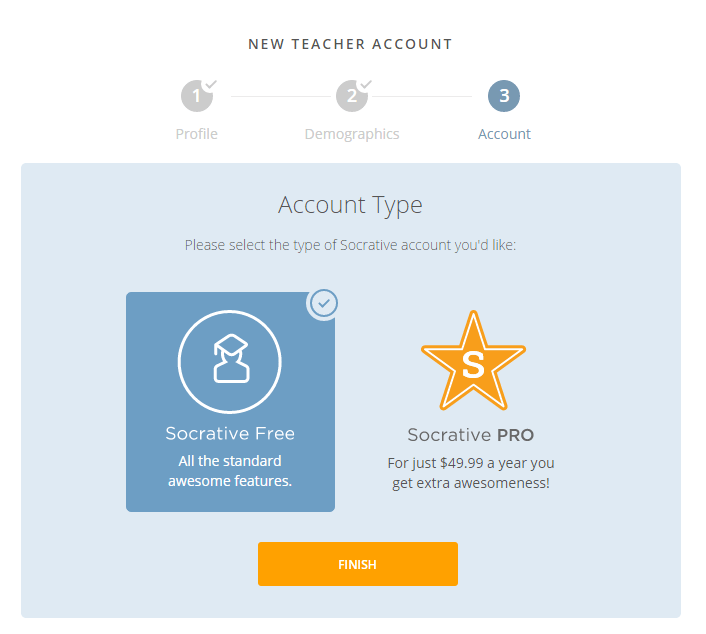
This will take you to the registration form where you can input information about yourself, your demographic (including the institution) and your account type (free). Socrative will automatically set you up with a teacher account, as students do not need accounts to participate.
Setting up your room
When you first sign in your will be given a default room name. Your room is the area in which you will create your quizzes and questions and the students will then use the room name to access these.
You can change the details of the default room and add new rooms using the ‘Rooms’ tab along the top of the Socrative homepage. To edit the room name (you may wish to change this to something more meaningful such a module code) click on the pencil icon next to the existing room name.

Once a room is set up you are ready to create a quiz.
Socrative: Creating Quizzes
Once you have set up an account and room to can begin to create a quiz. To create a quiz go to the Quizzes tab and follow the button to ‘Create Quiz’. Socrative allows you to create three types of question; Multiple Choice, True/False and Short Answer. You will be given the option to name your quiz and add questions to it from the 3 choices. Clicking on the 3 options will drop down a menu for adding the question, the answer options and information to explain the correct answer.
Watch the video below to see this in action!
Once you have created a quiz containing your questions you can select ‘Save & Exit’ to return to the Socrative homepage.
Running a Quiz
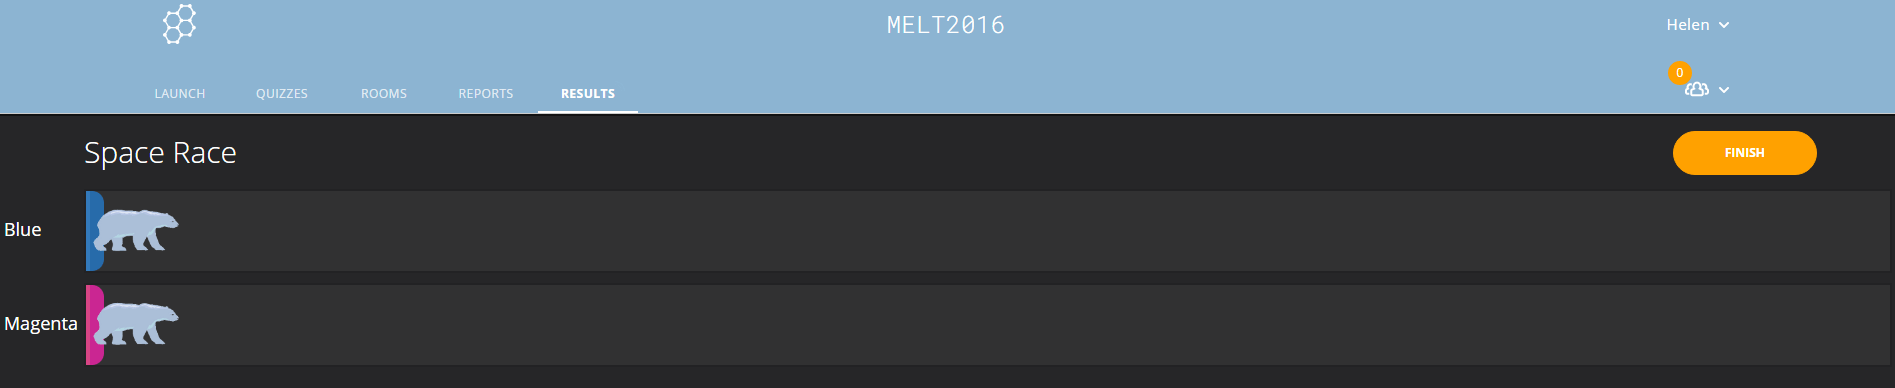
Space Race
When running a quiz you will be presented with various options. This includes running the quiz normally or as a space race. A space race quiz allows students to be part of teams and race to complete all of the questions in the quiz. The progress of the teams will then be shown on the screen. The space race option can be selected from the Socrative homepage.
Teacher Paced
Once you have chosen to begin a quiz from the homepage you will be given the option to run the quiz at the teachers pace. This will allow you to move through the quiz at your pace ensuring all students answer before any answers are presented or gives chance for discussion related to the question.
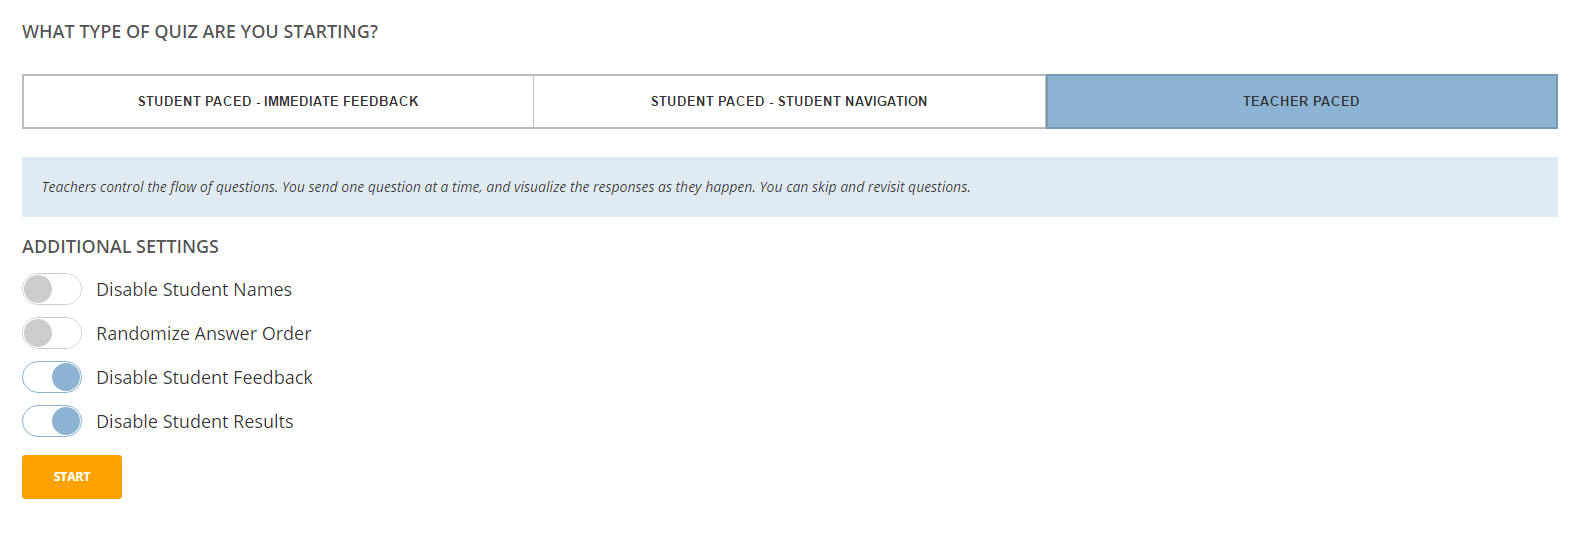
Student Paced
There are 2 options for allowing the quiz to be student paced.
Immediate feedback – Students receive immediate right/wrong feedback and explanations after they answer each question. Students answer questions in order and cannot skip or change their answers. You are able to monitor their progress via a live results table.
Student navigation – Students have the ability to edit question responses, skip questions and navigate the quiz their own way. Once they’ve completed the activity they can submit the entire assessment. You are able to monitor their progress via a live results table.
Quick question
The final quiz option available is quick question. This allows you to quickly write a question to present to the students and can provide quick and easy feedback on a topic. You can choose from the same 3 question options as normal.

Student access
For students to be able to access the quiz they can either download the Socrative app or simply go to www.socrative.com and use the menu on the right hand side to select ‘Student Login’. This will then ask them to input the room name and a name. You can decide whether to display names and student results on the screen or keep it annonymous. If you choose to hide the student names and scores you will still be able to view their results and names in the reports afterwards.
Watch the video below to see the teacher and student views simultaneously.
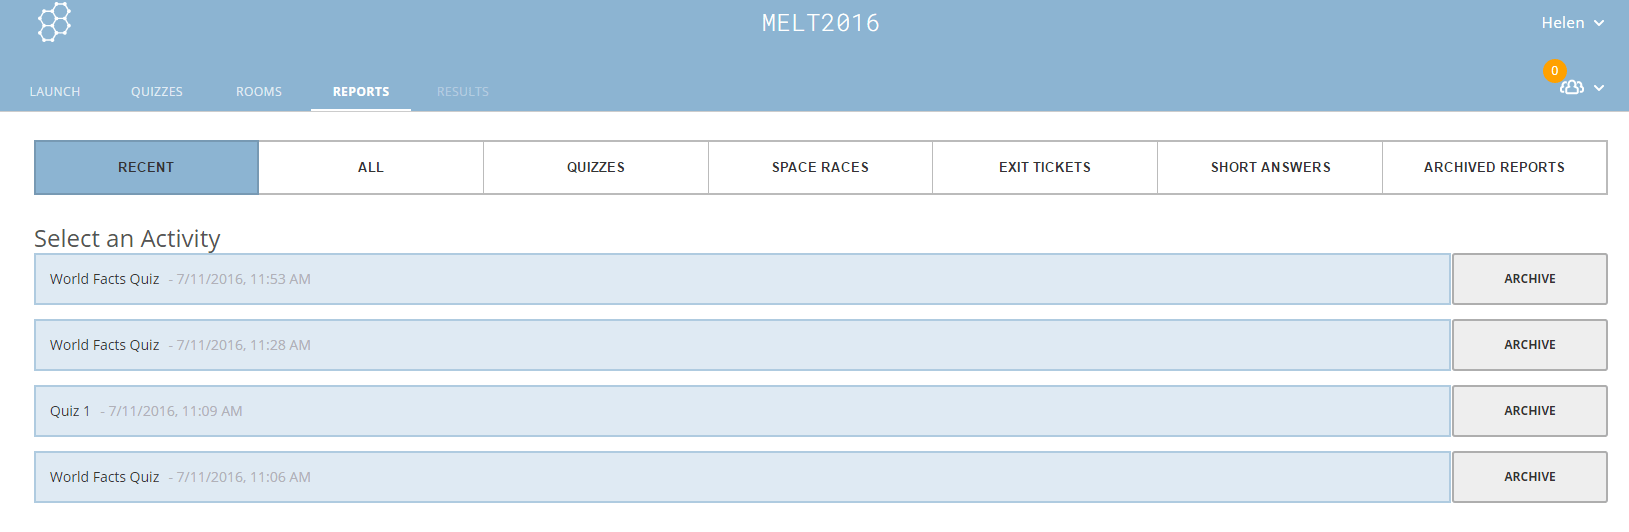
Reports
Once a quiz has been completed there are extensive reports available at both class and student level. These can be exported from the ‘Finish’ button directly after a quiz or from the ‘Reports’ tab on the home page.
Types of digital pedagogy
Use the below sections to download further information about the digital pedagogy below.
Synchronous
Learning
Asynchronous
Learning

Face to face
Learning

Located
Learning

Connected
Learning

Fieldwork
Pedagogy

Lecture
Pedagogy

Practical
pedagogy

Seminar
Pedagogy

Supported study
pedagogy

Tutorial
Pedagogy

Webinar
Pedagogy

Work-based learning
Pedagogy

Workshop
Pedagogy

